How I Make Comic Panels in Procreate
I love Procreate. Having it on my iPad was a game changer, enabling me to make the art I dreamt of from anywhere. But if there’s one area Procreate is lacking, it’s comic-making tools.
But just because comic making in Procreate is less intuitive than, say, Clip Studio Paint, doesn’t mean it can’t be done. And it all starts with easy panelling. This is my process for quickly and easily making panels in Procreate.
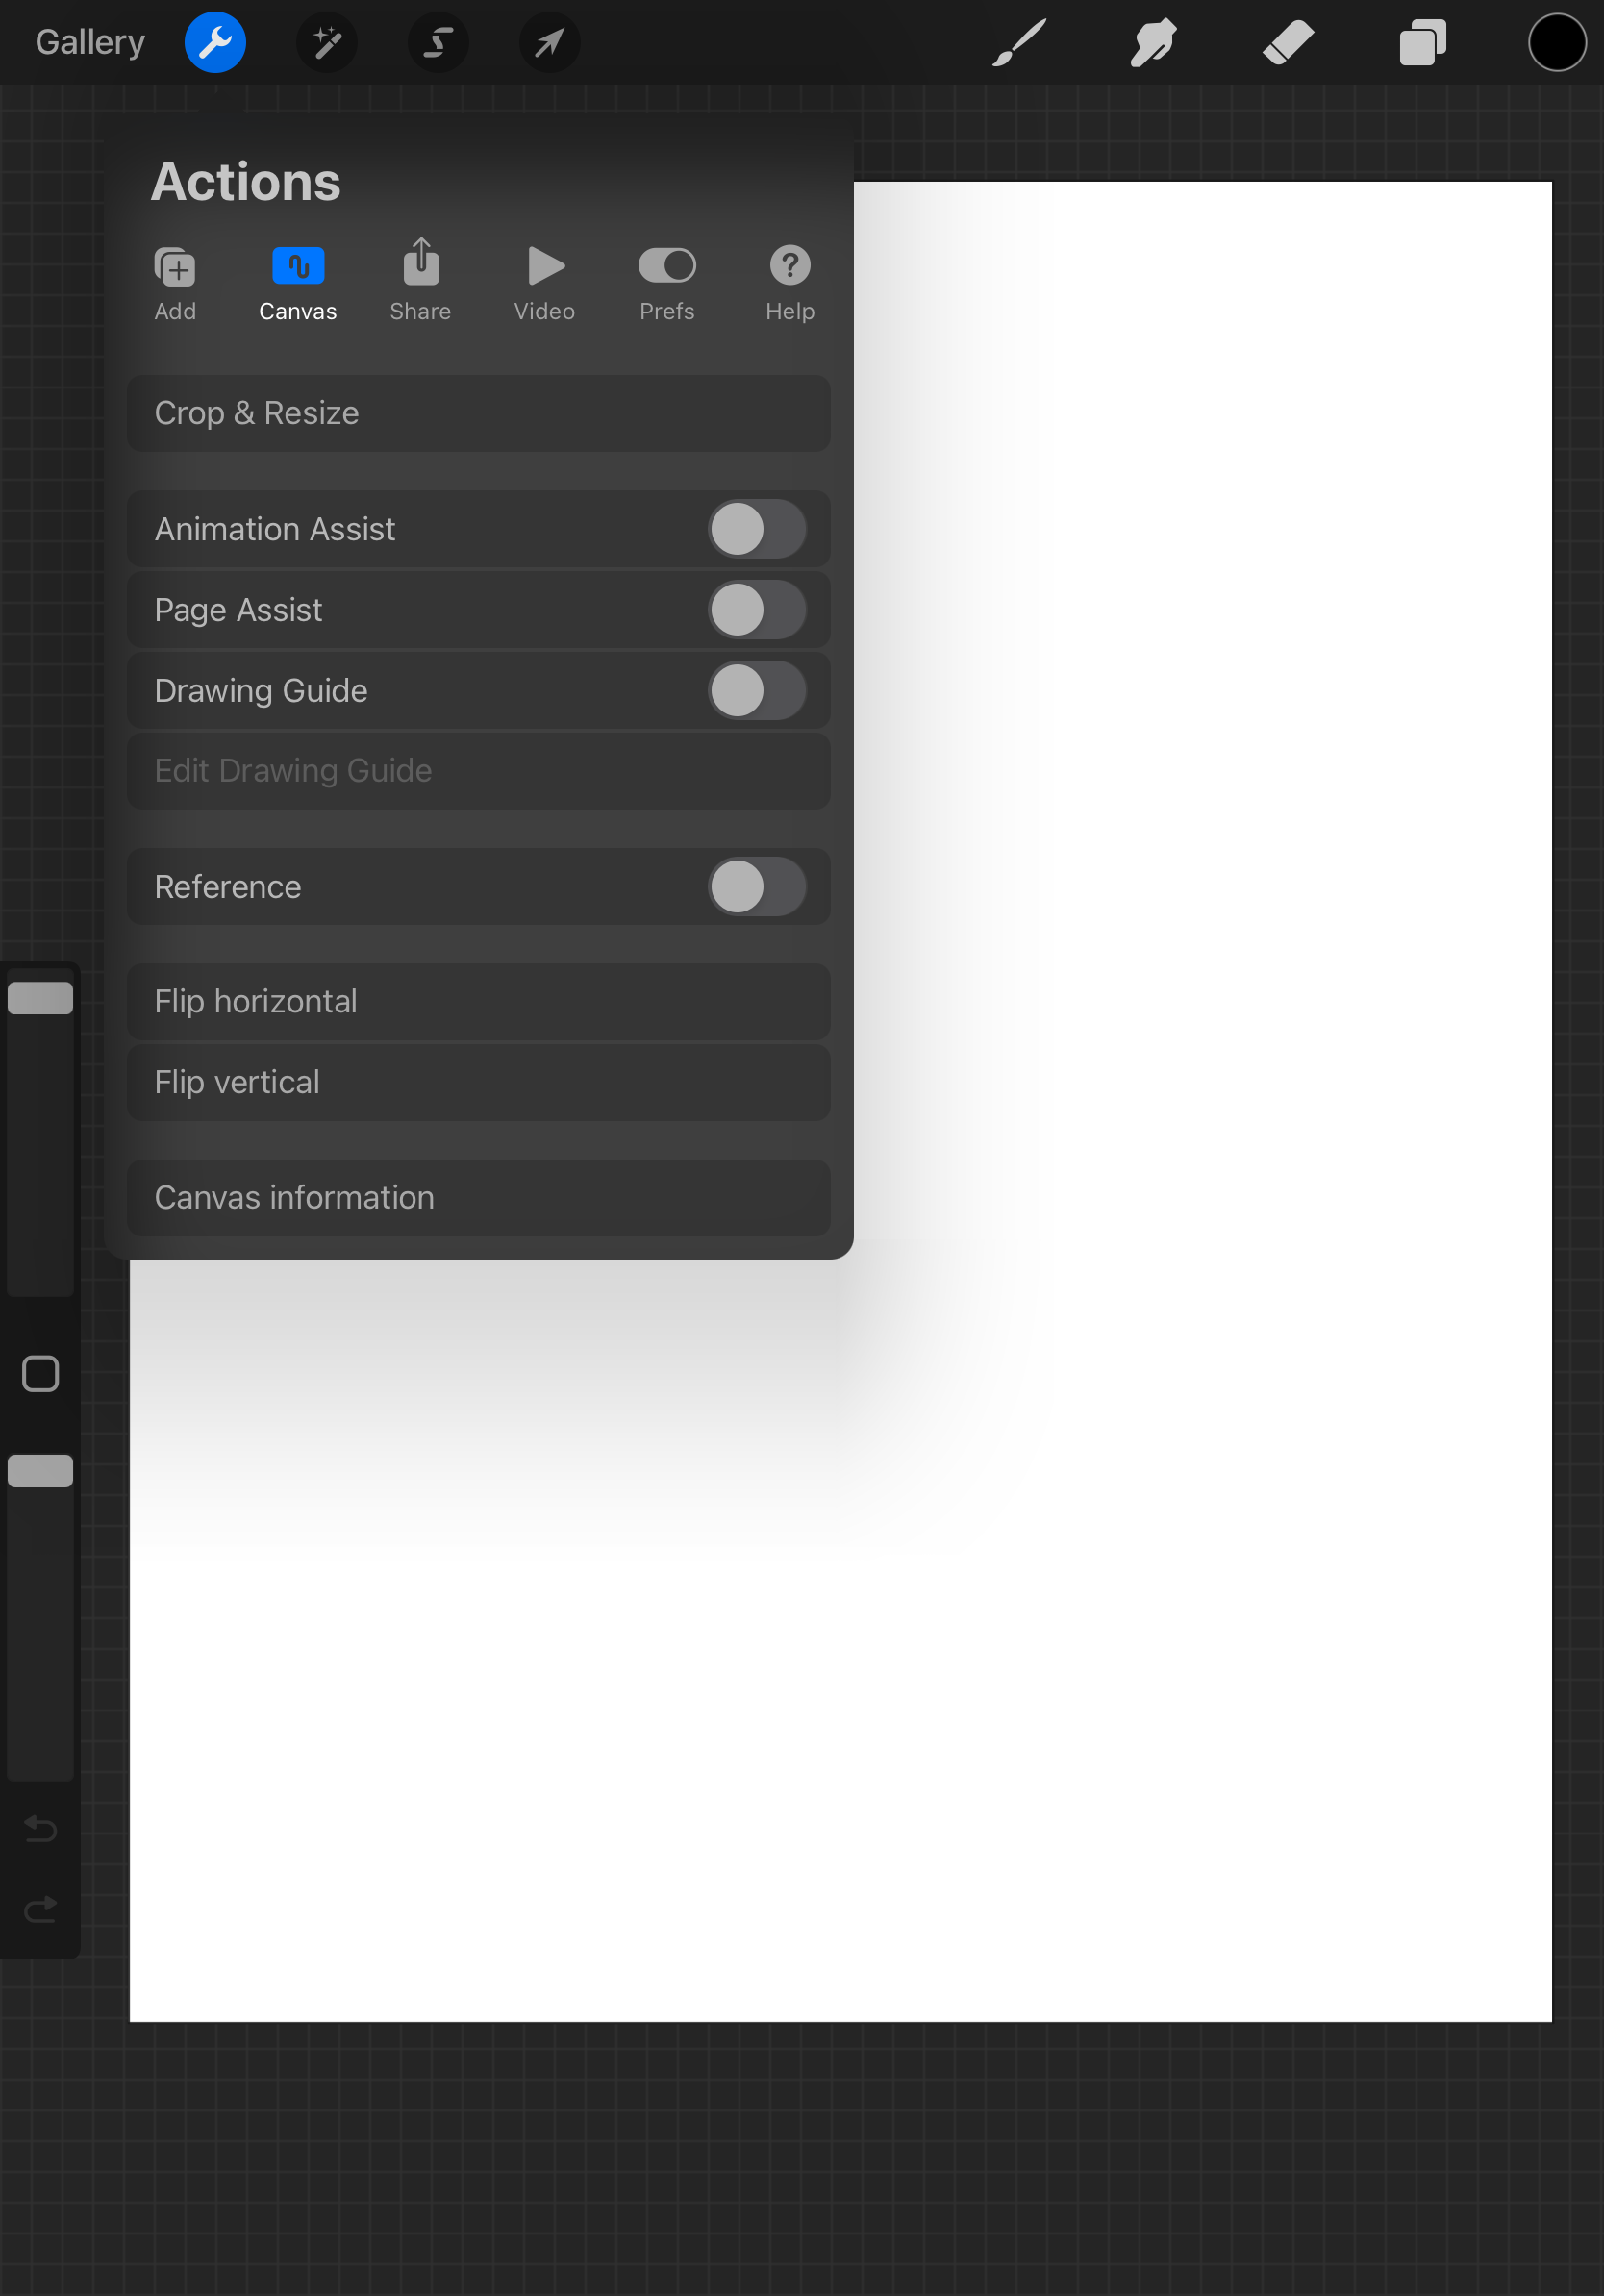
Step 1: In your canvas, add a Drawing Guide
Drawing guide can be found under the Actions - Canvas tab
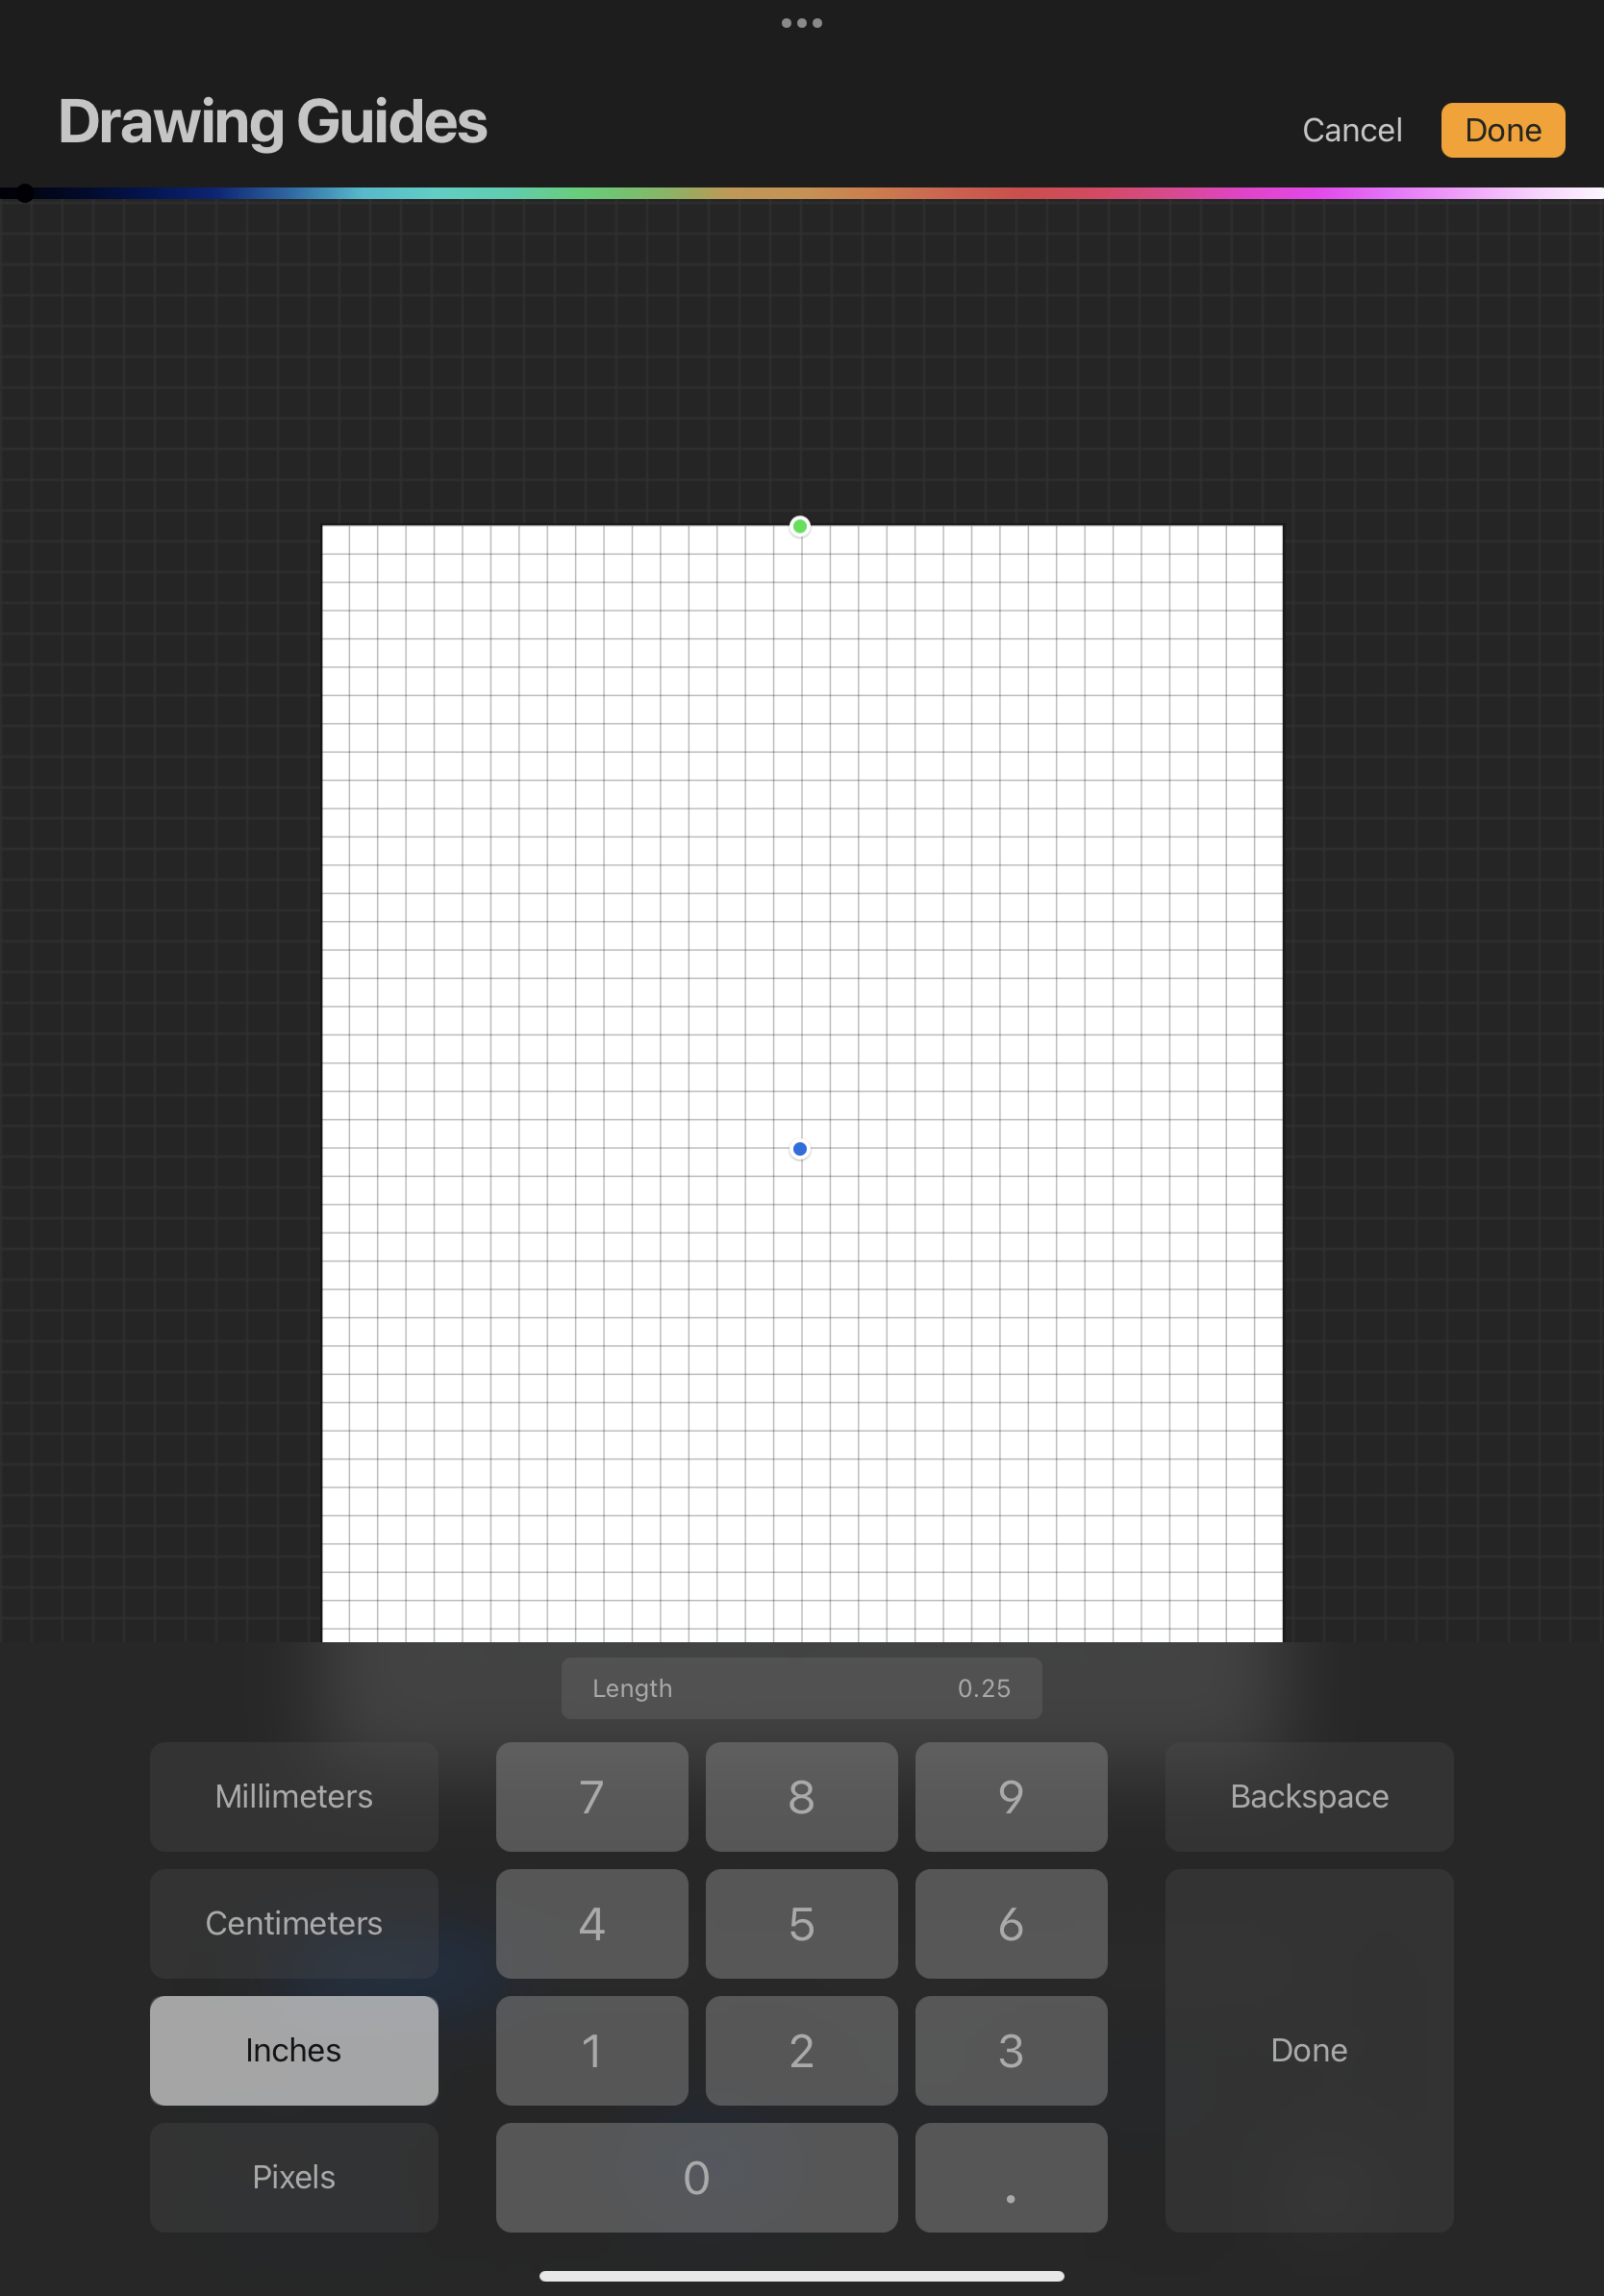
Step 2: Change your drawing guide to a measuring division you understand. For example, if you are working with an Imperial Page Size (mine here is 8.5 x 11” or letter), try 0.25”.
This menu is found under "Edit Drawing Guide"
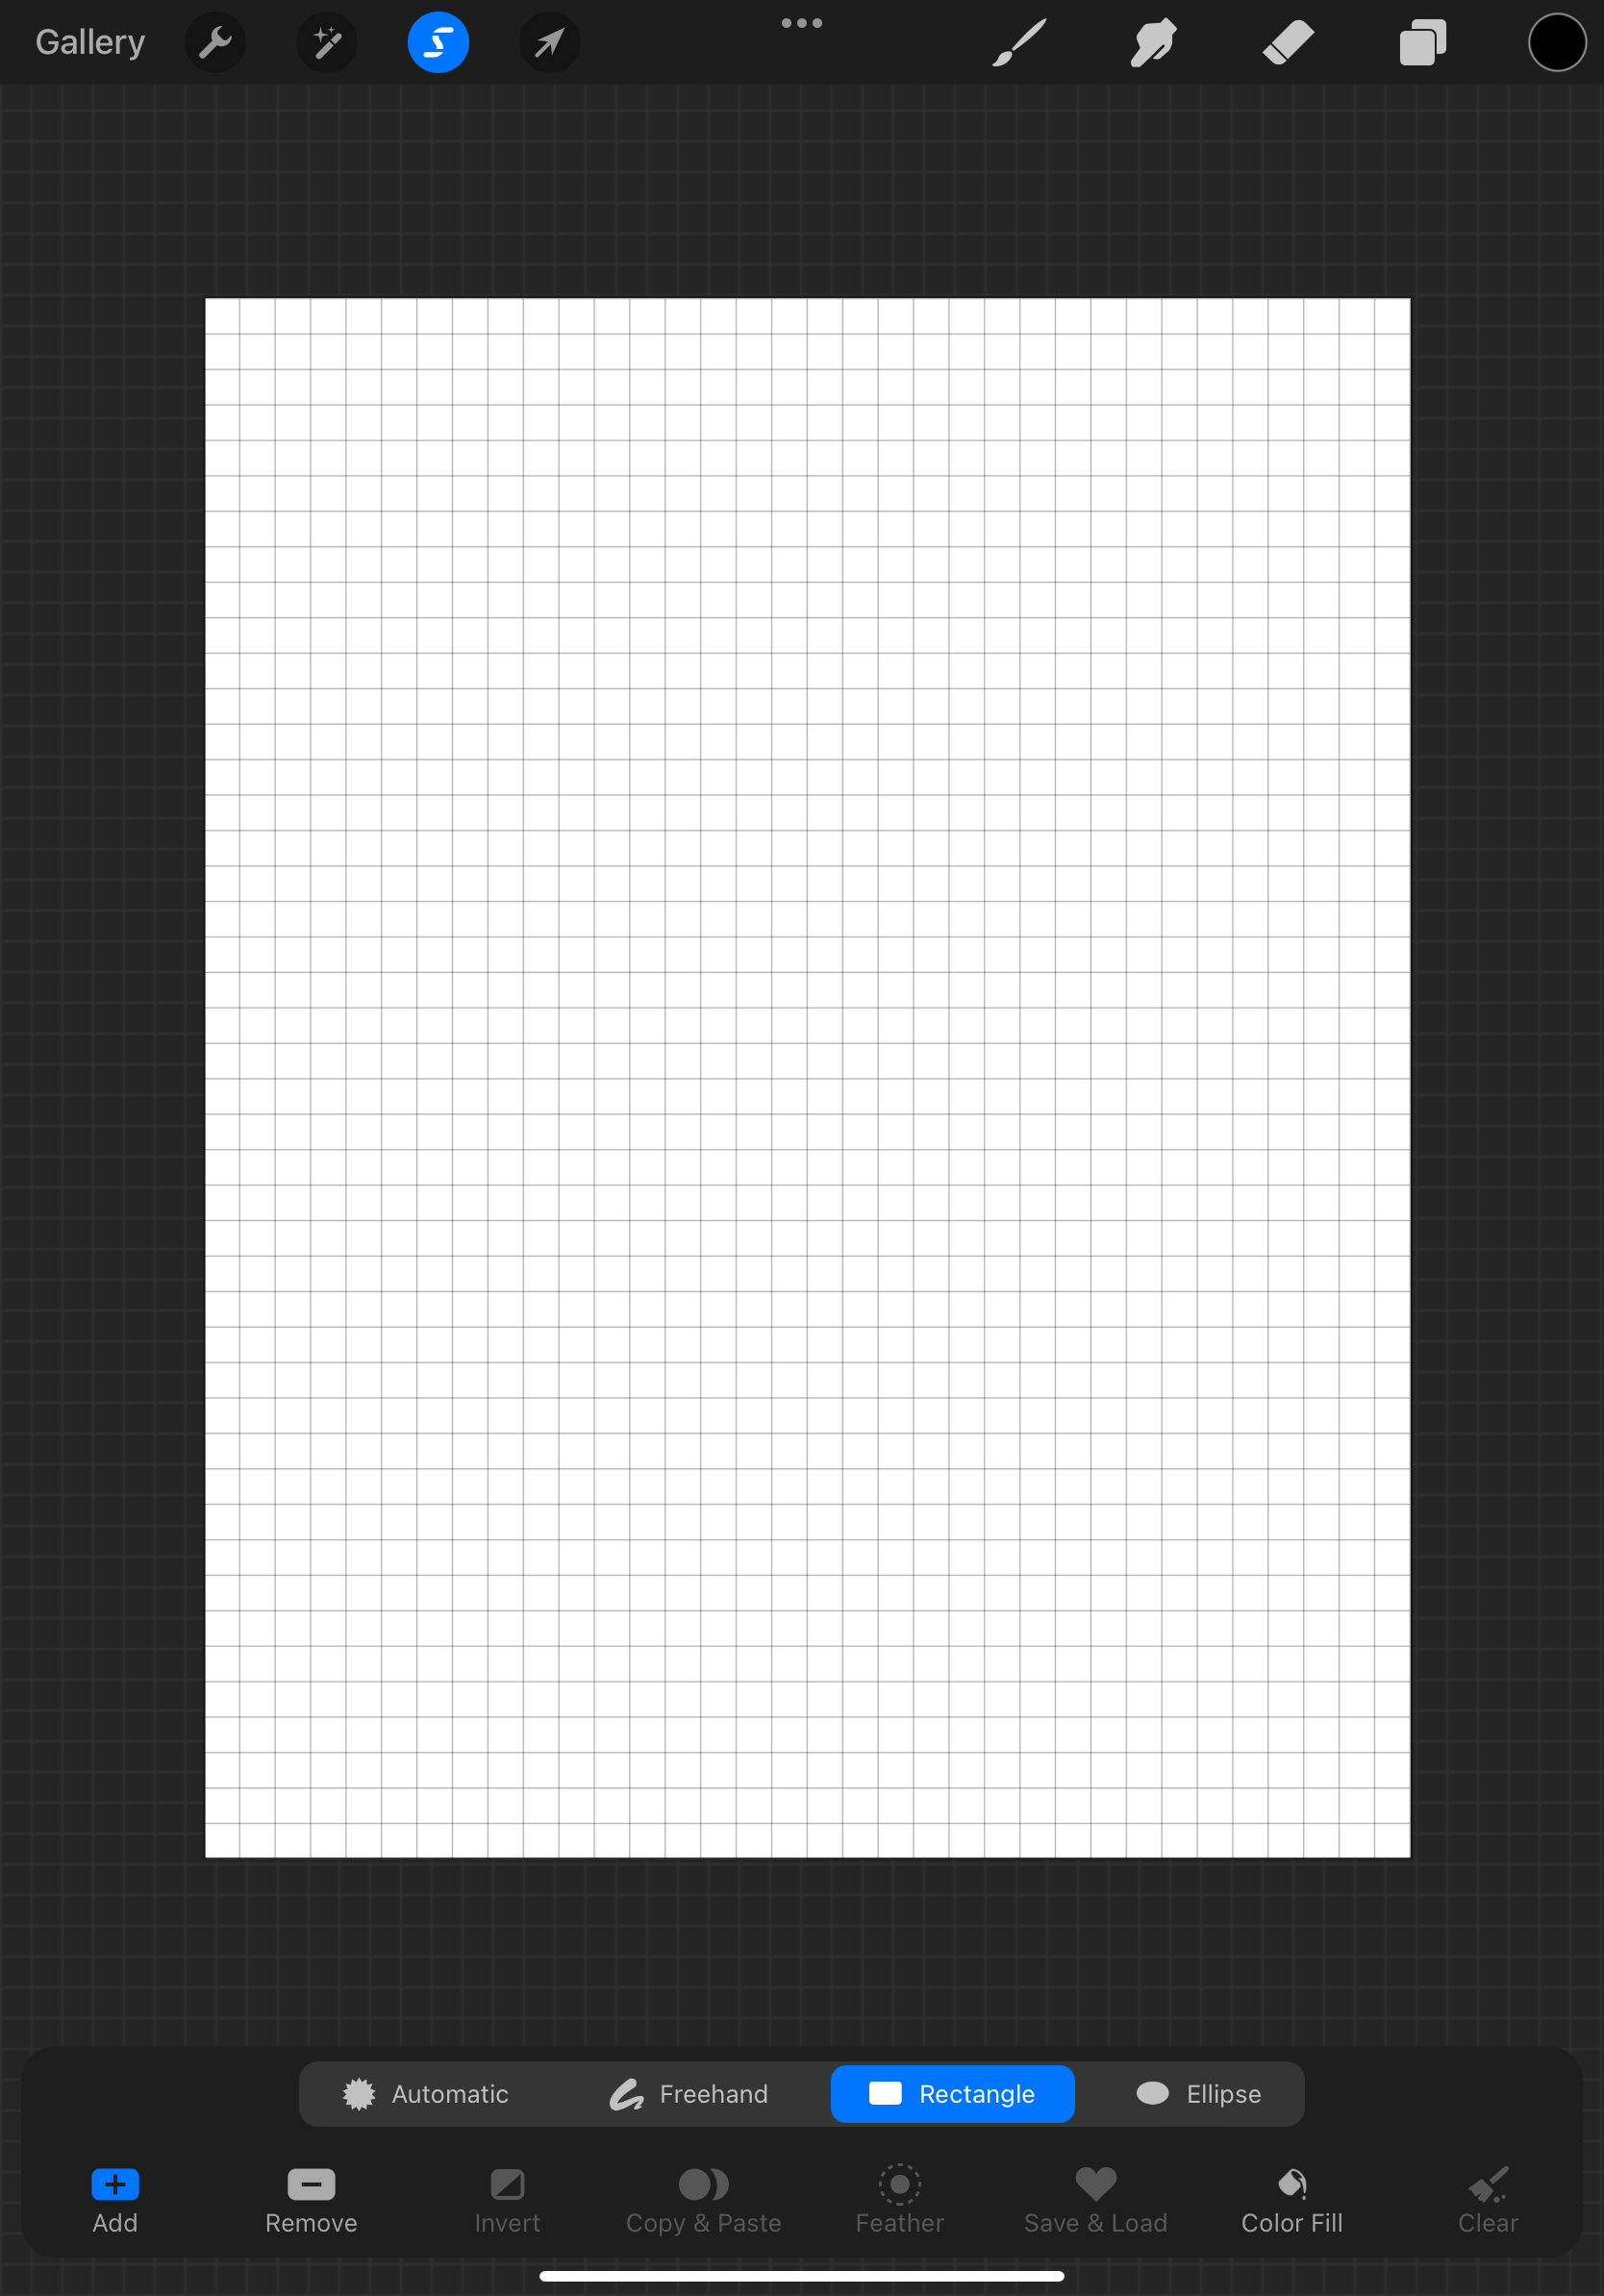
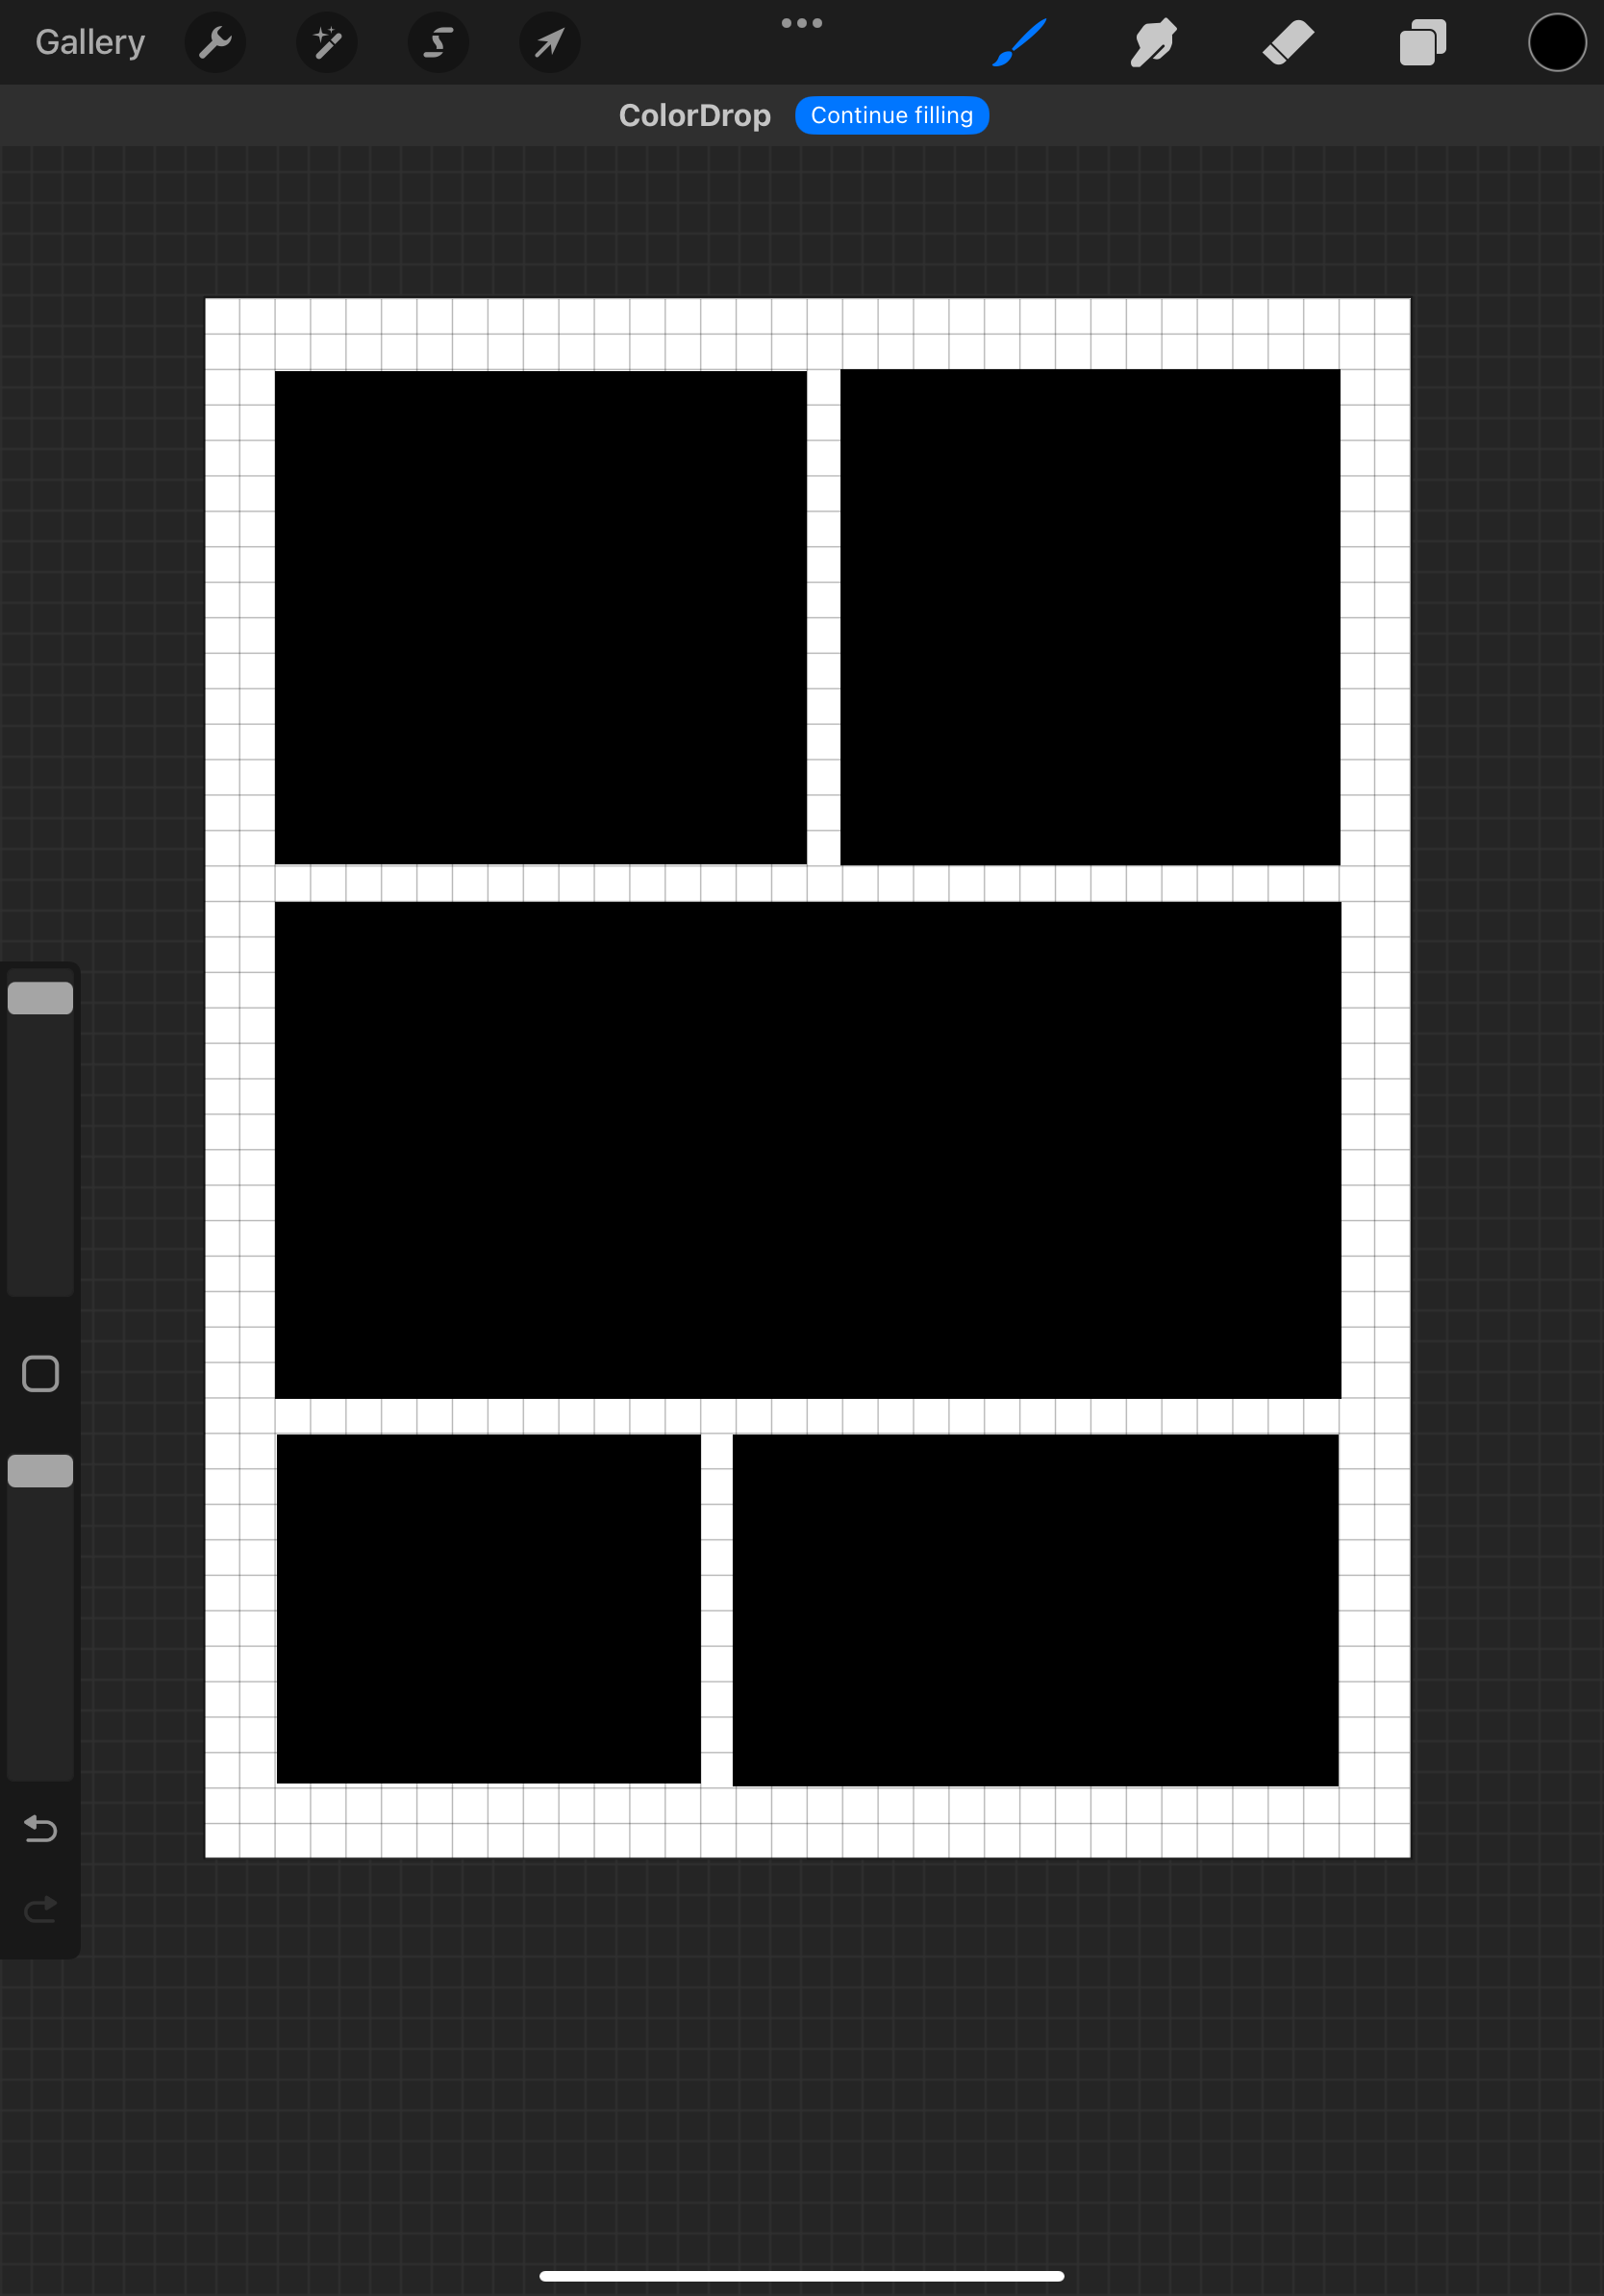
Step 3: Decide how big your outside margin and gutters are. Here, I’ll use a 0.5” outside margin and 0.25” gutters. That means my outside margins are made of two squares on the grid and my gutters are one. Now, with the rectangle tool, put in your first panel and fill it with a solid colour.
The rectangle selection tool pops up as an option as soon as you click the Selection menu.
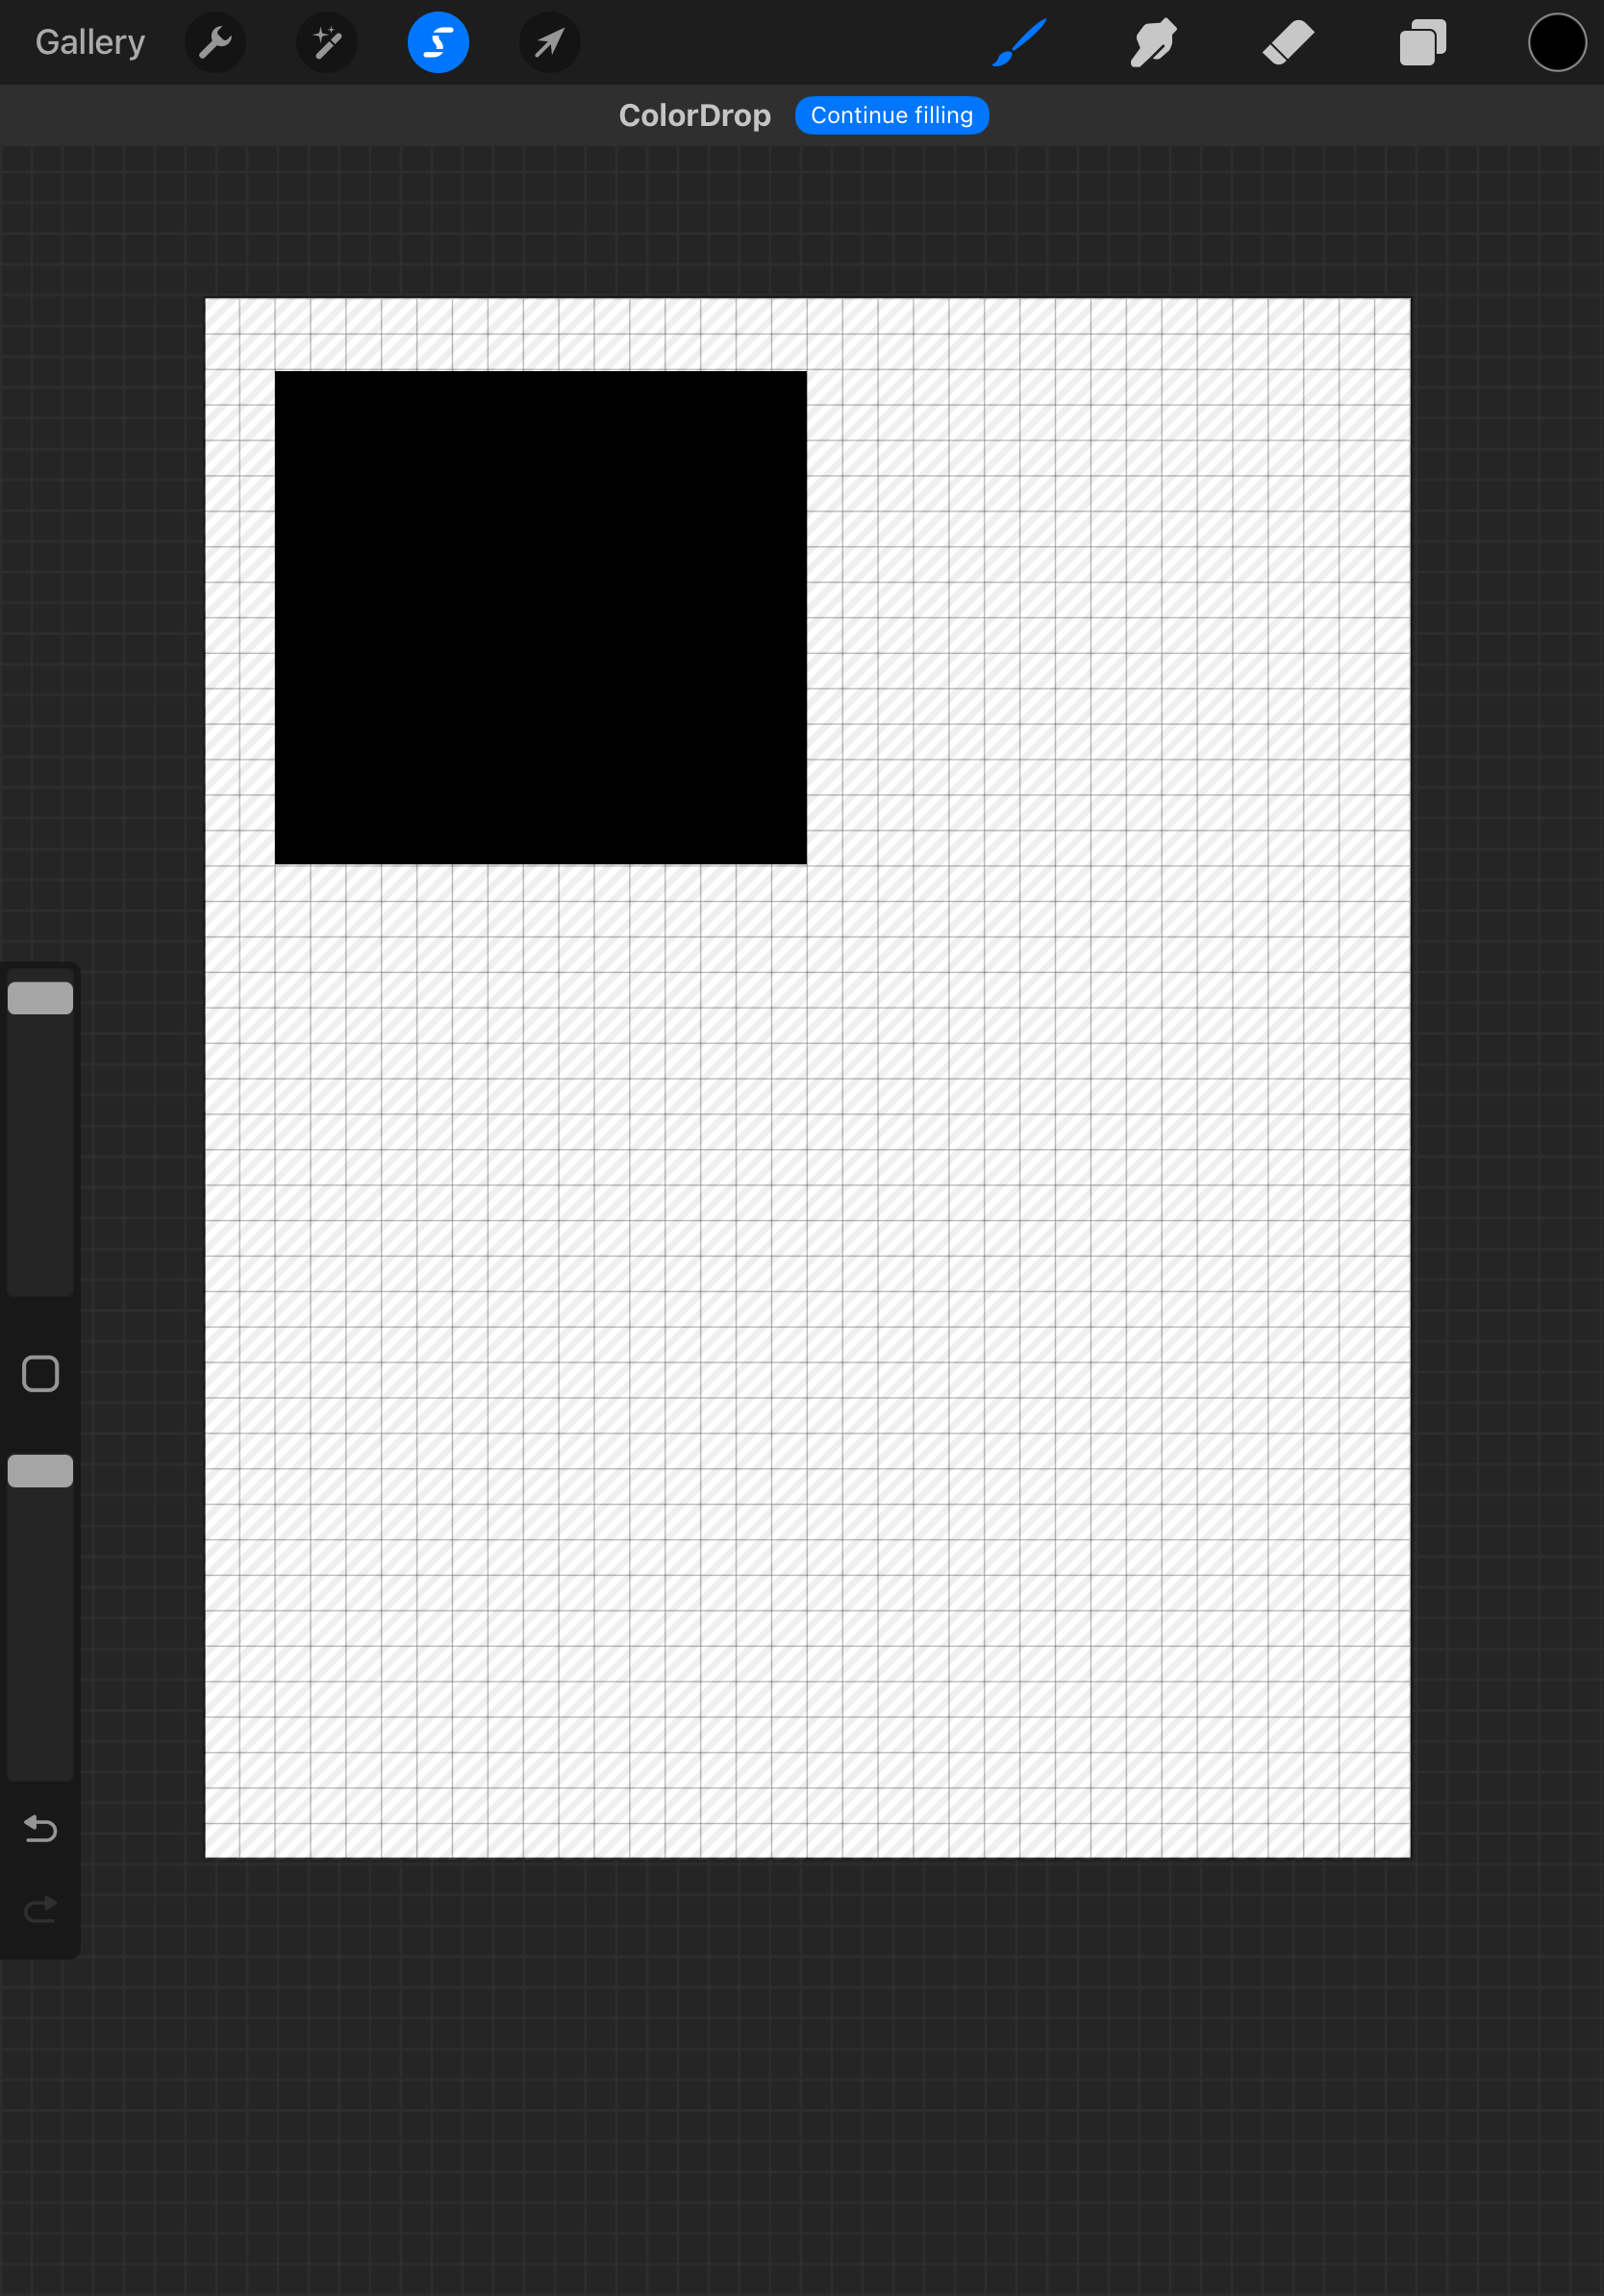
Fill in the selection of your first panel with a solid colour. Black is a good choice for easy visibility while you work.
Step 4: Continue to use the rectangle tool to fill the page with your panels, using the grid as your guide for layout, sizes and even gutters.
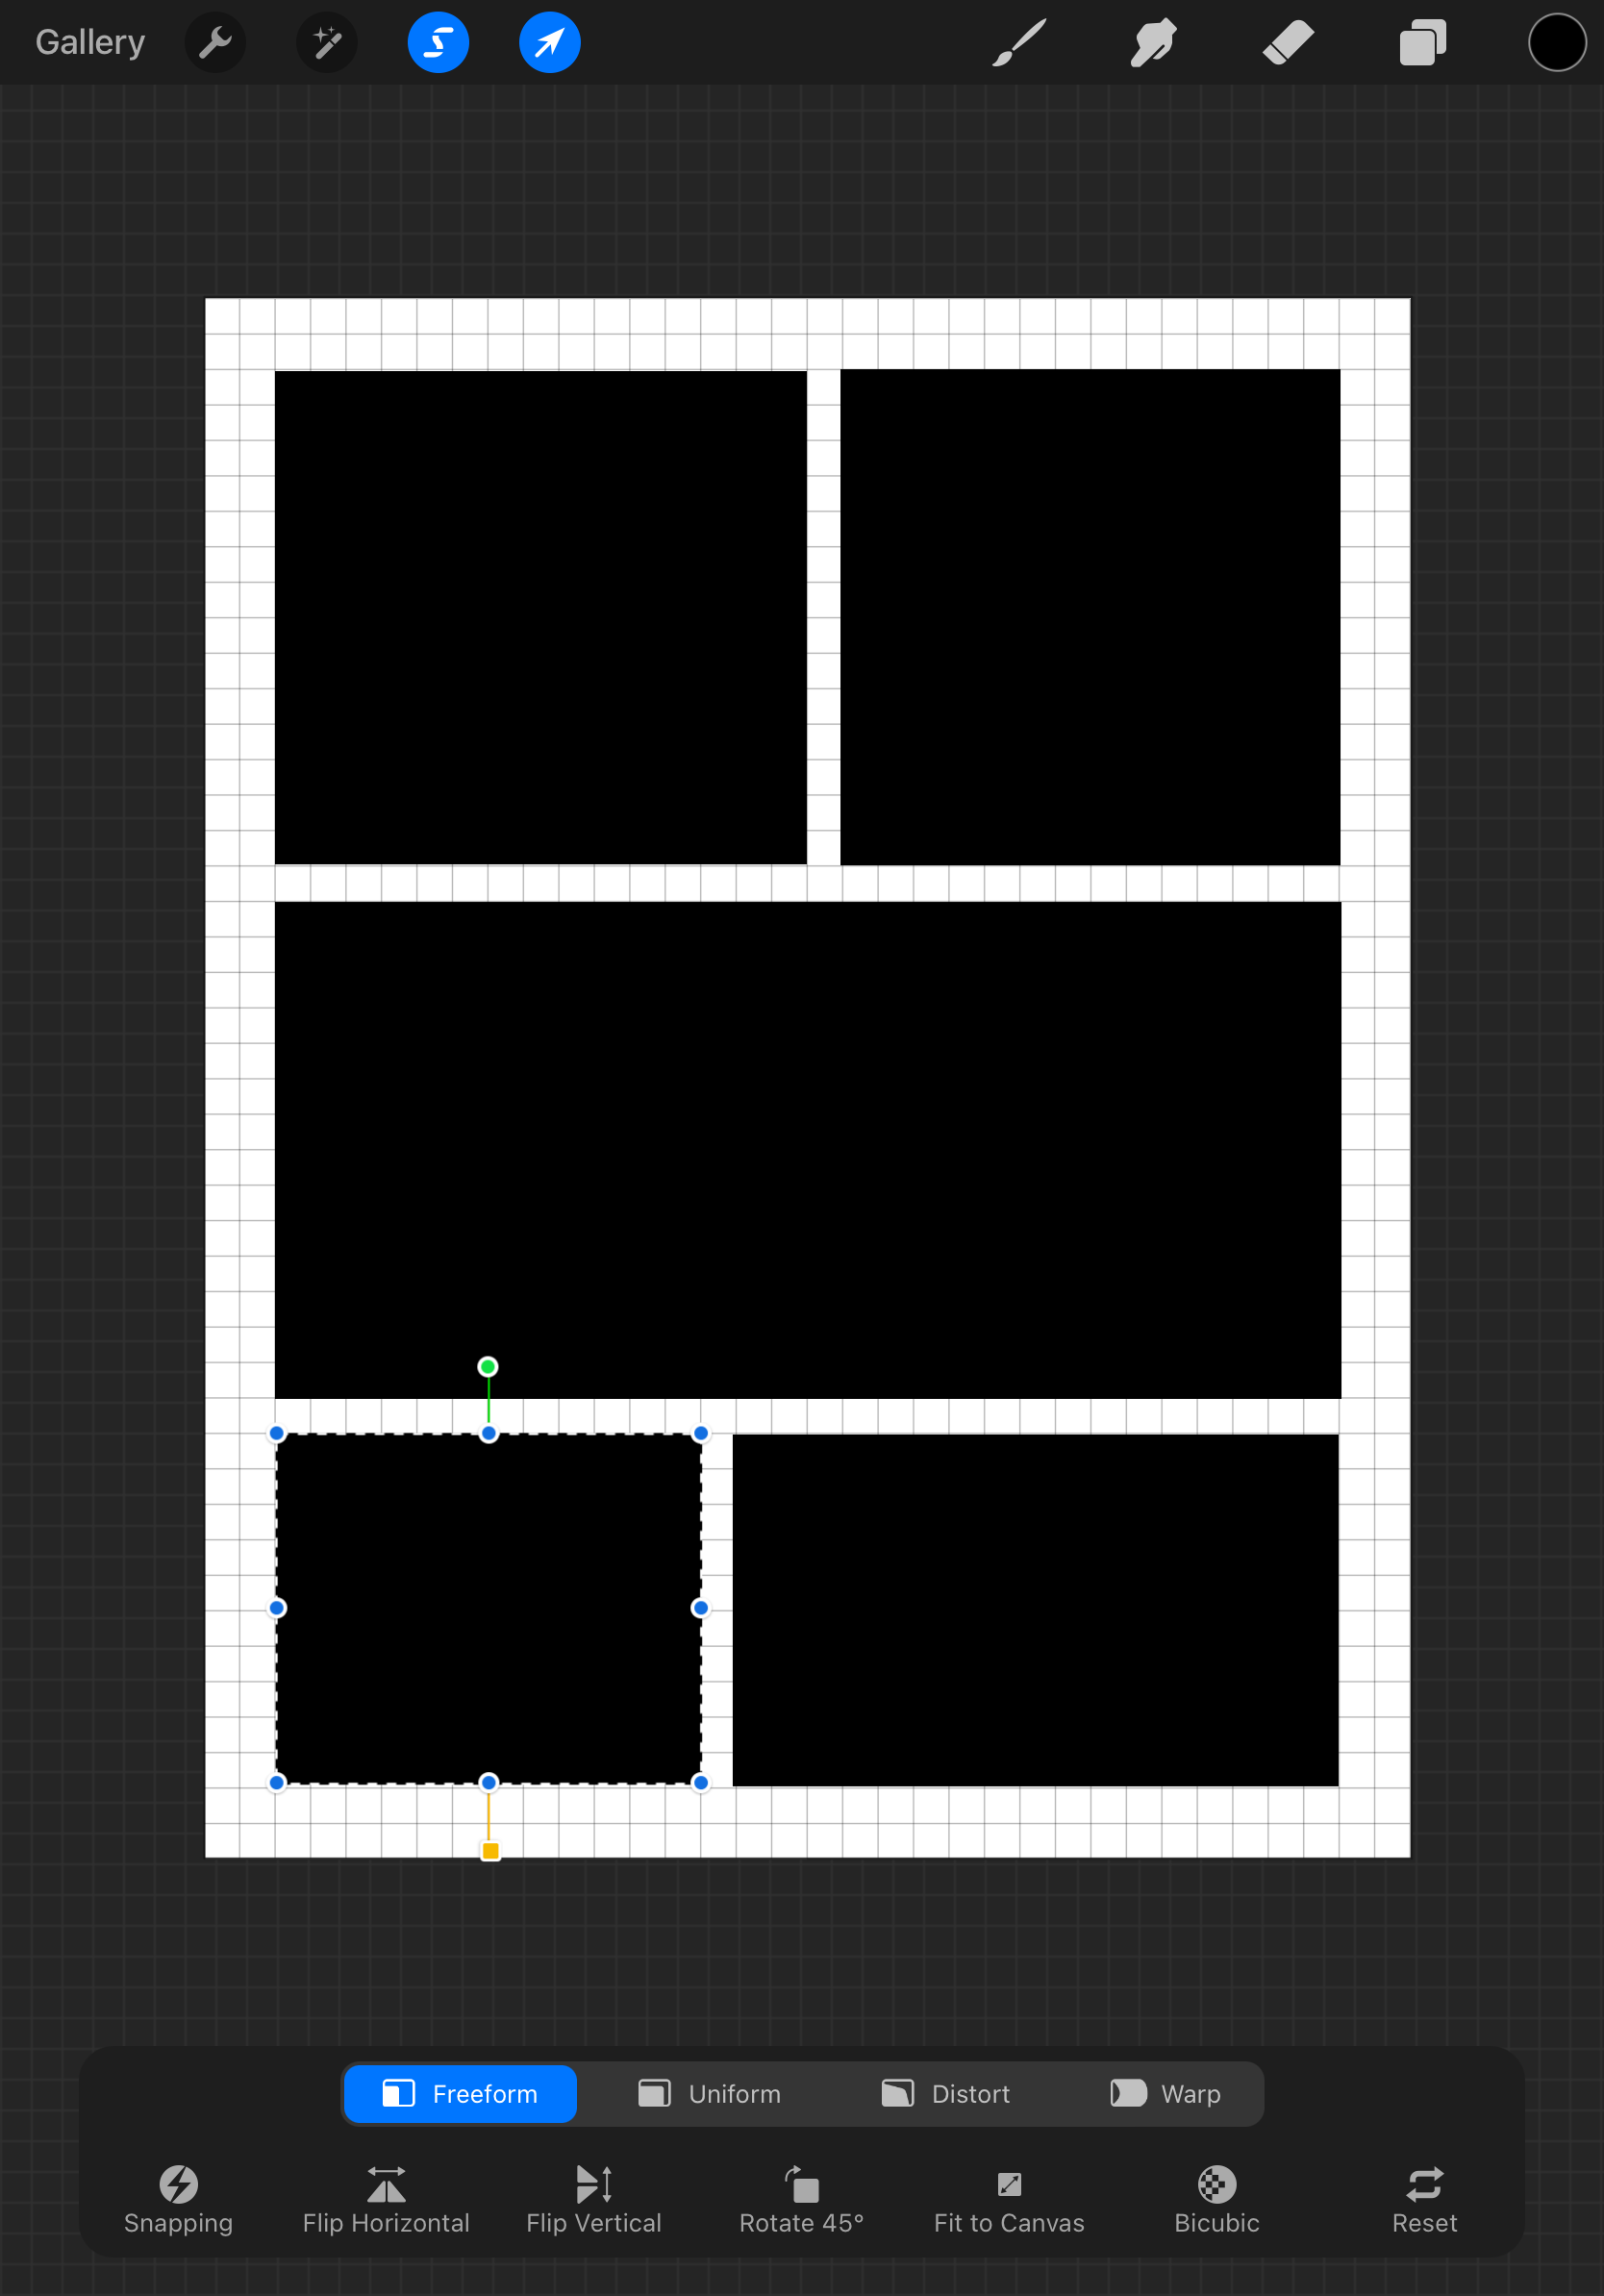
Step 5: Don’t stress if one of your panels doesn’t quite line up. You can always adjust them afterward by re-selecting the panel and using the Freeform adjustment tool.
After you've selected the panel you want to adjust, click the Arrow tool in the top menu to pop up the toolbar to select Freeform adjustment. This lets you adjust the width and height independent from each other.
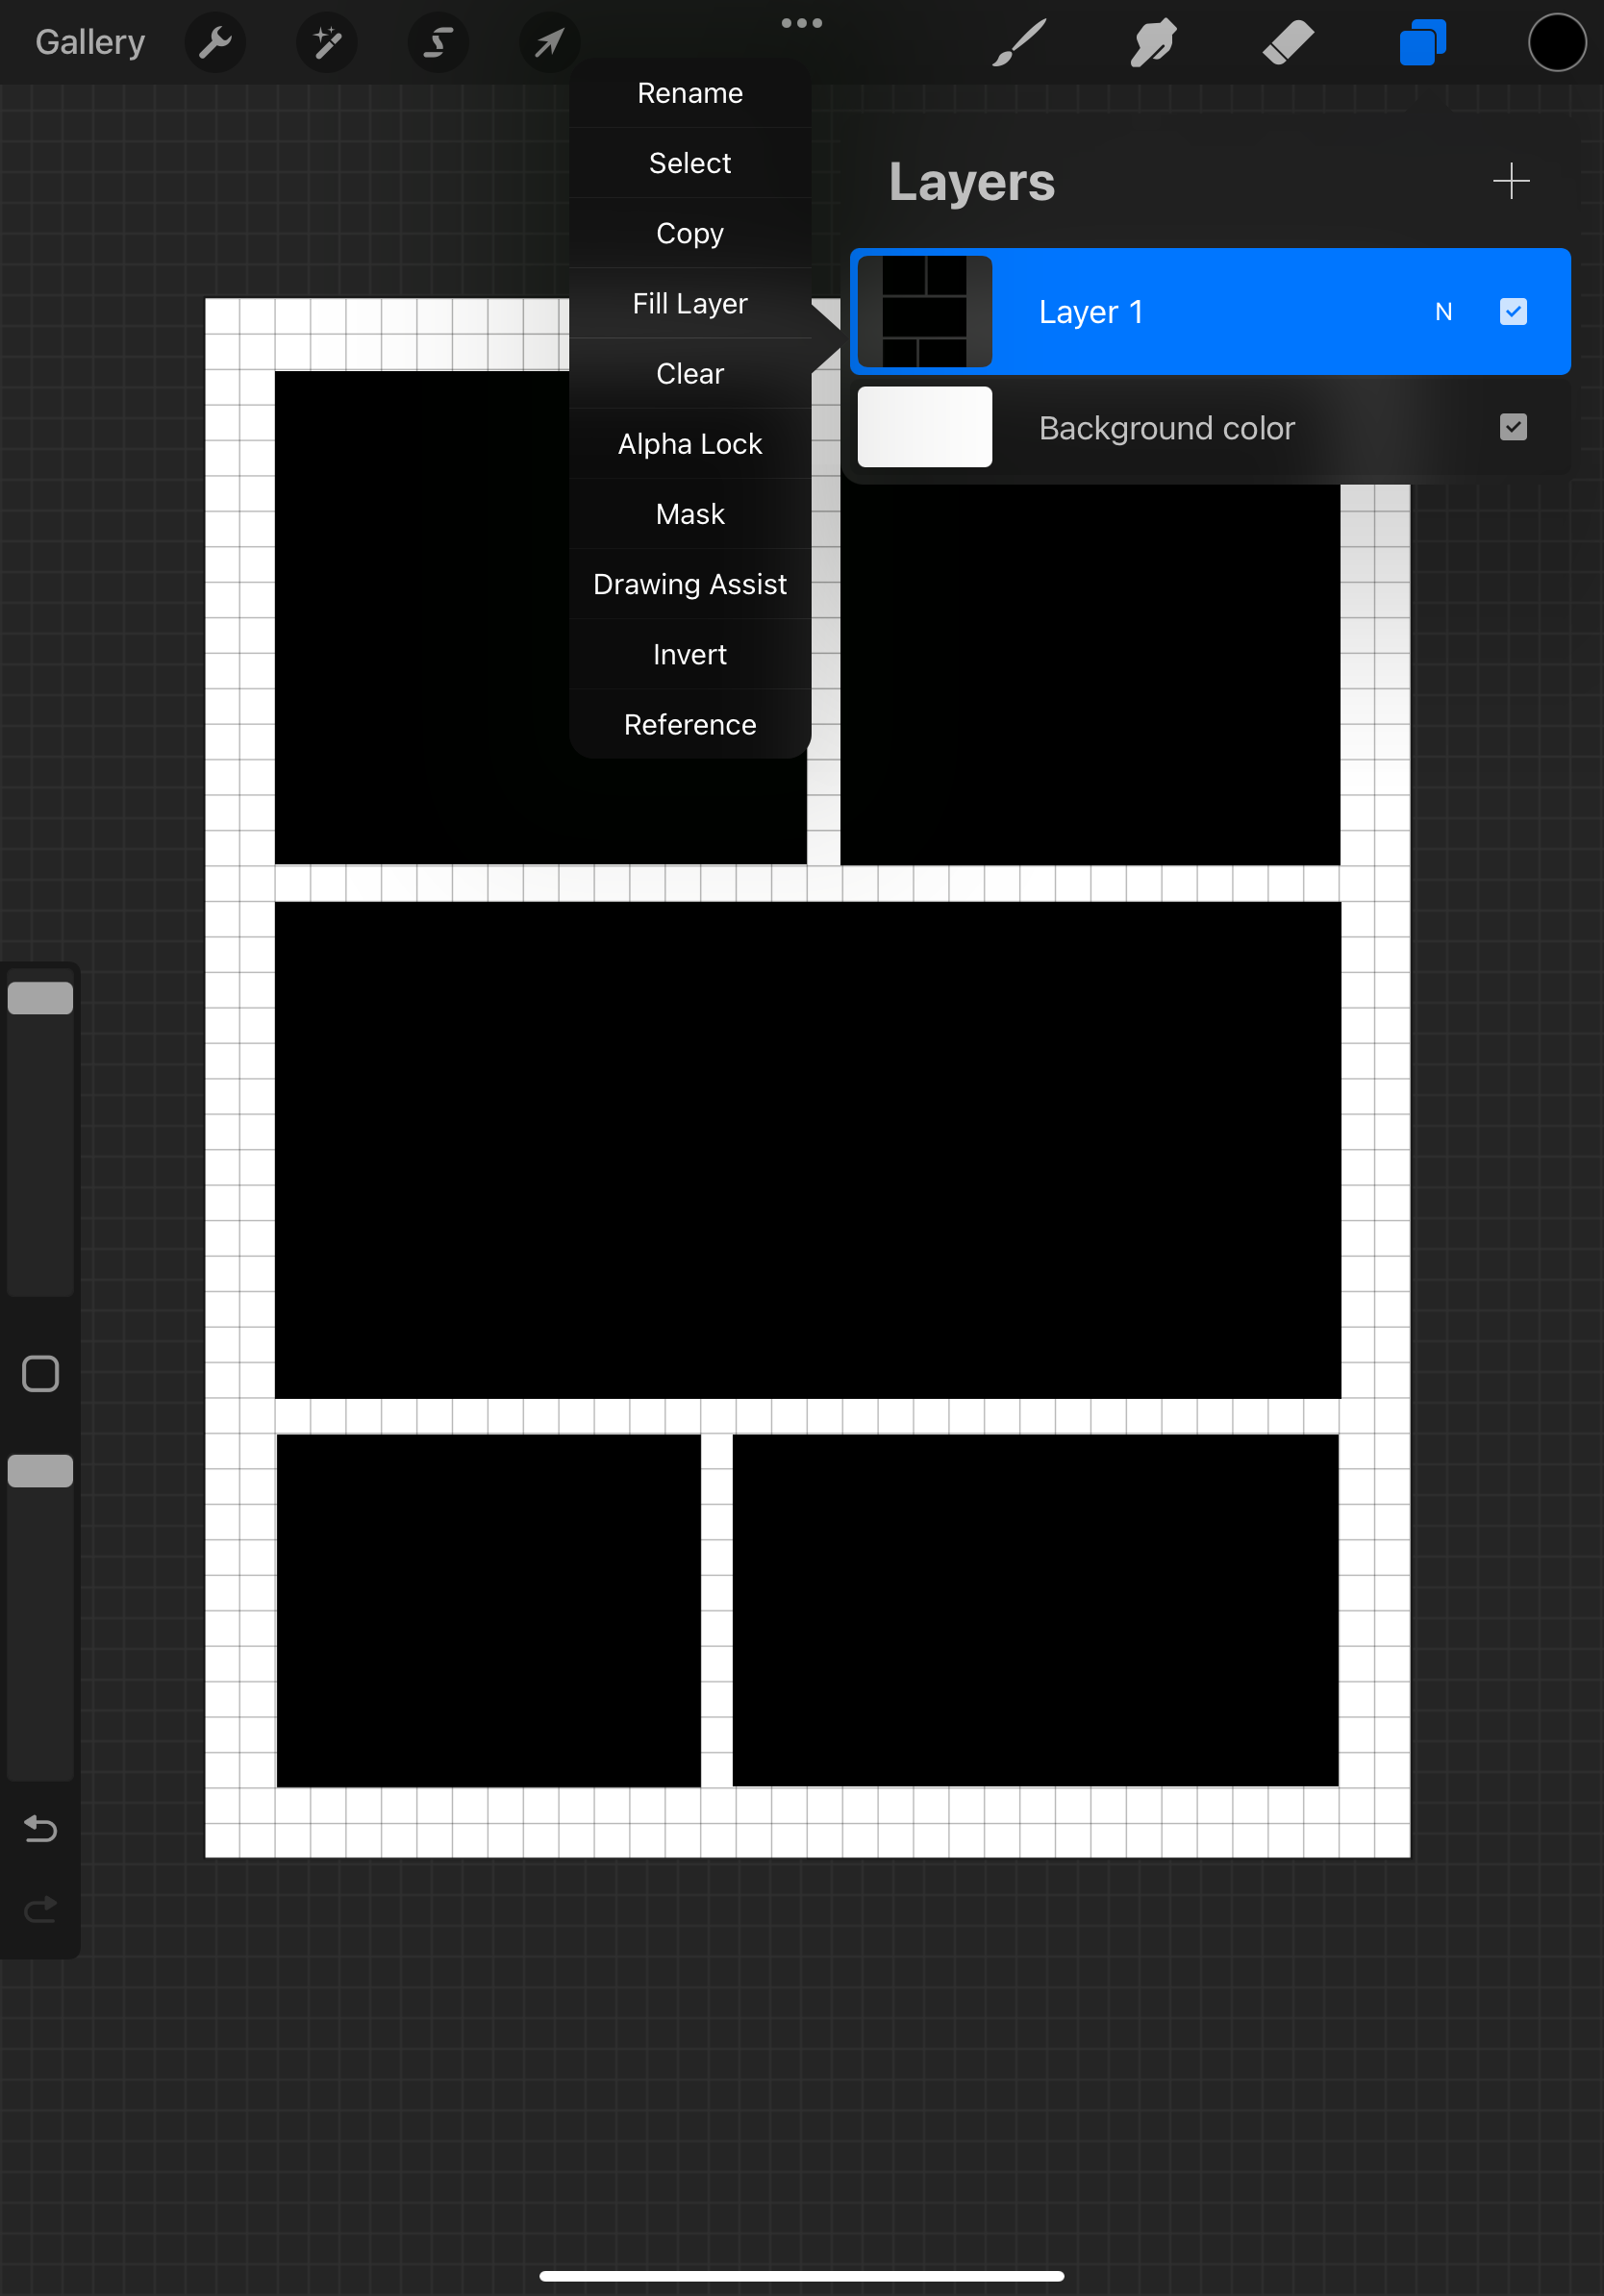
Step 6: In the layers tab, tap your layer of panels and choose “Select”
Single tap the layer to pull up the side menu with layer options.
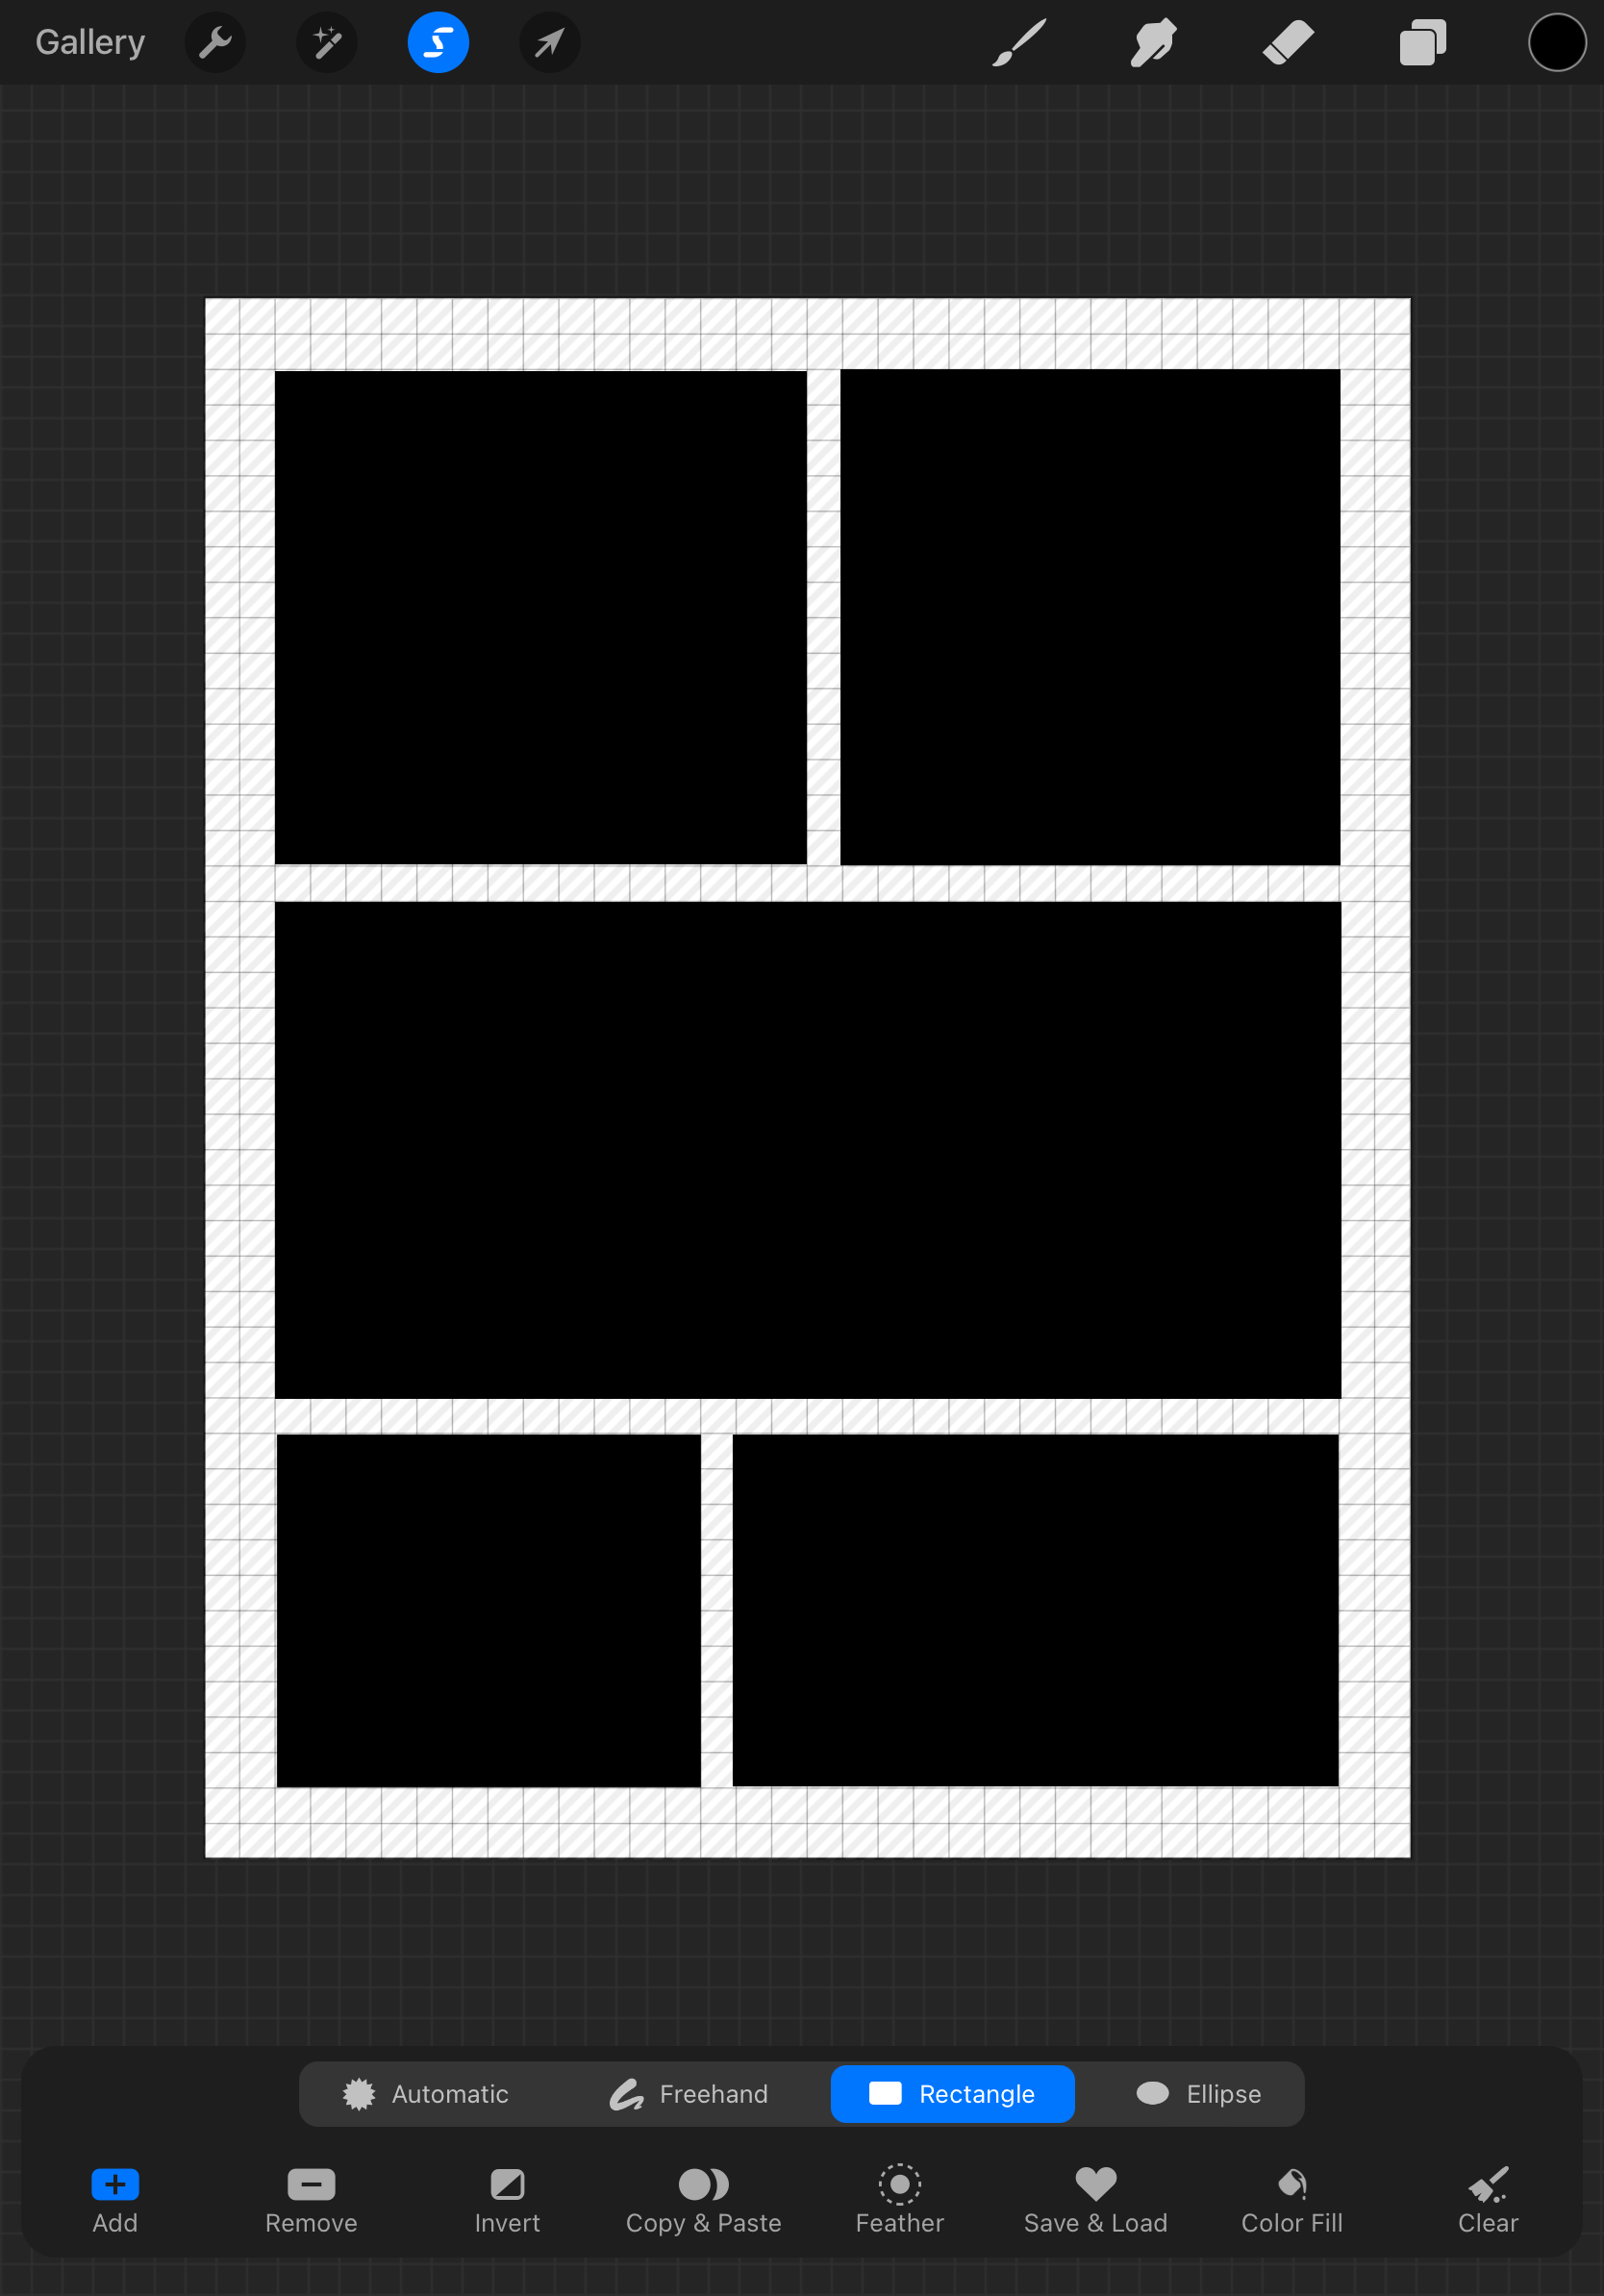
Step 7: This will pop up the Selection options toolbar at the bottom of the screen. Select “Invert”
Select Invert which flip-flops the selected and deselected areas of an image.
Step 8: Now you have the space between panels selected. Return to your layers tab and add a new layer.
The + icon in the Layer tab adds a new layer.
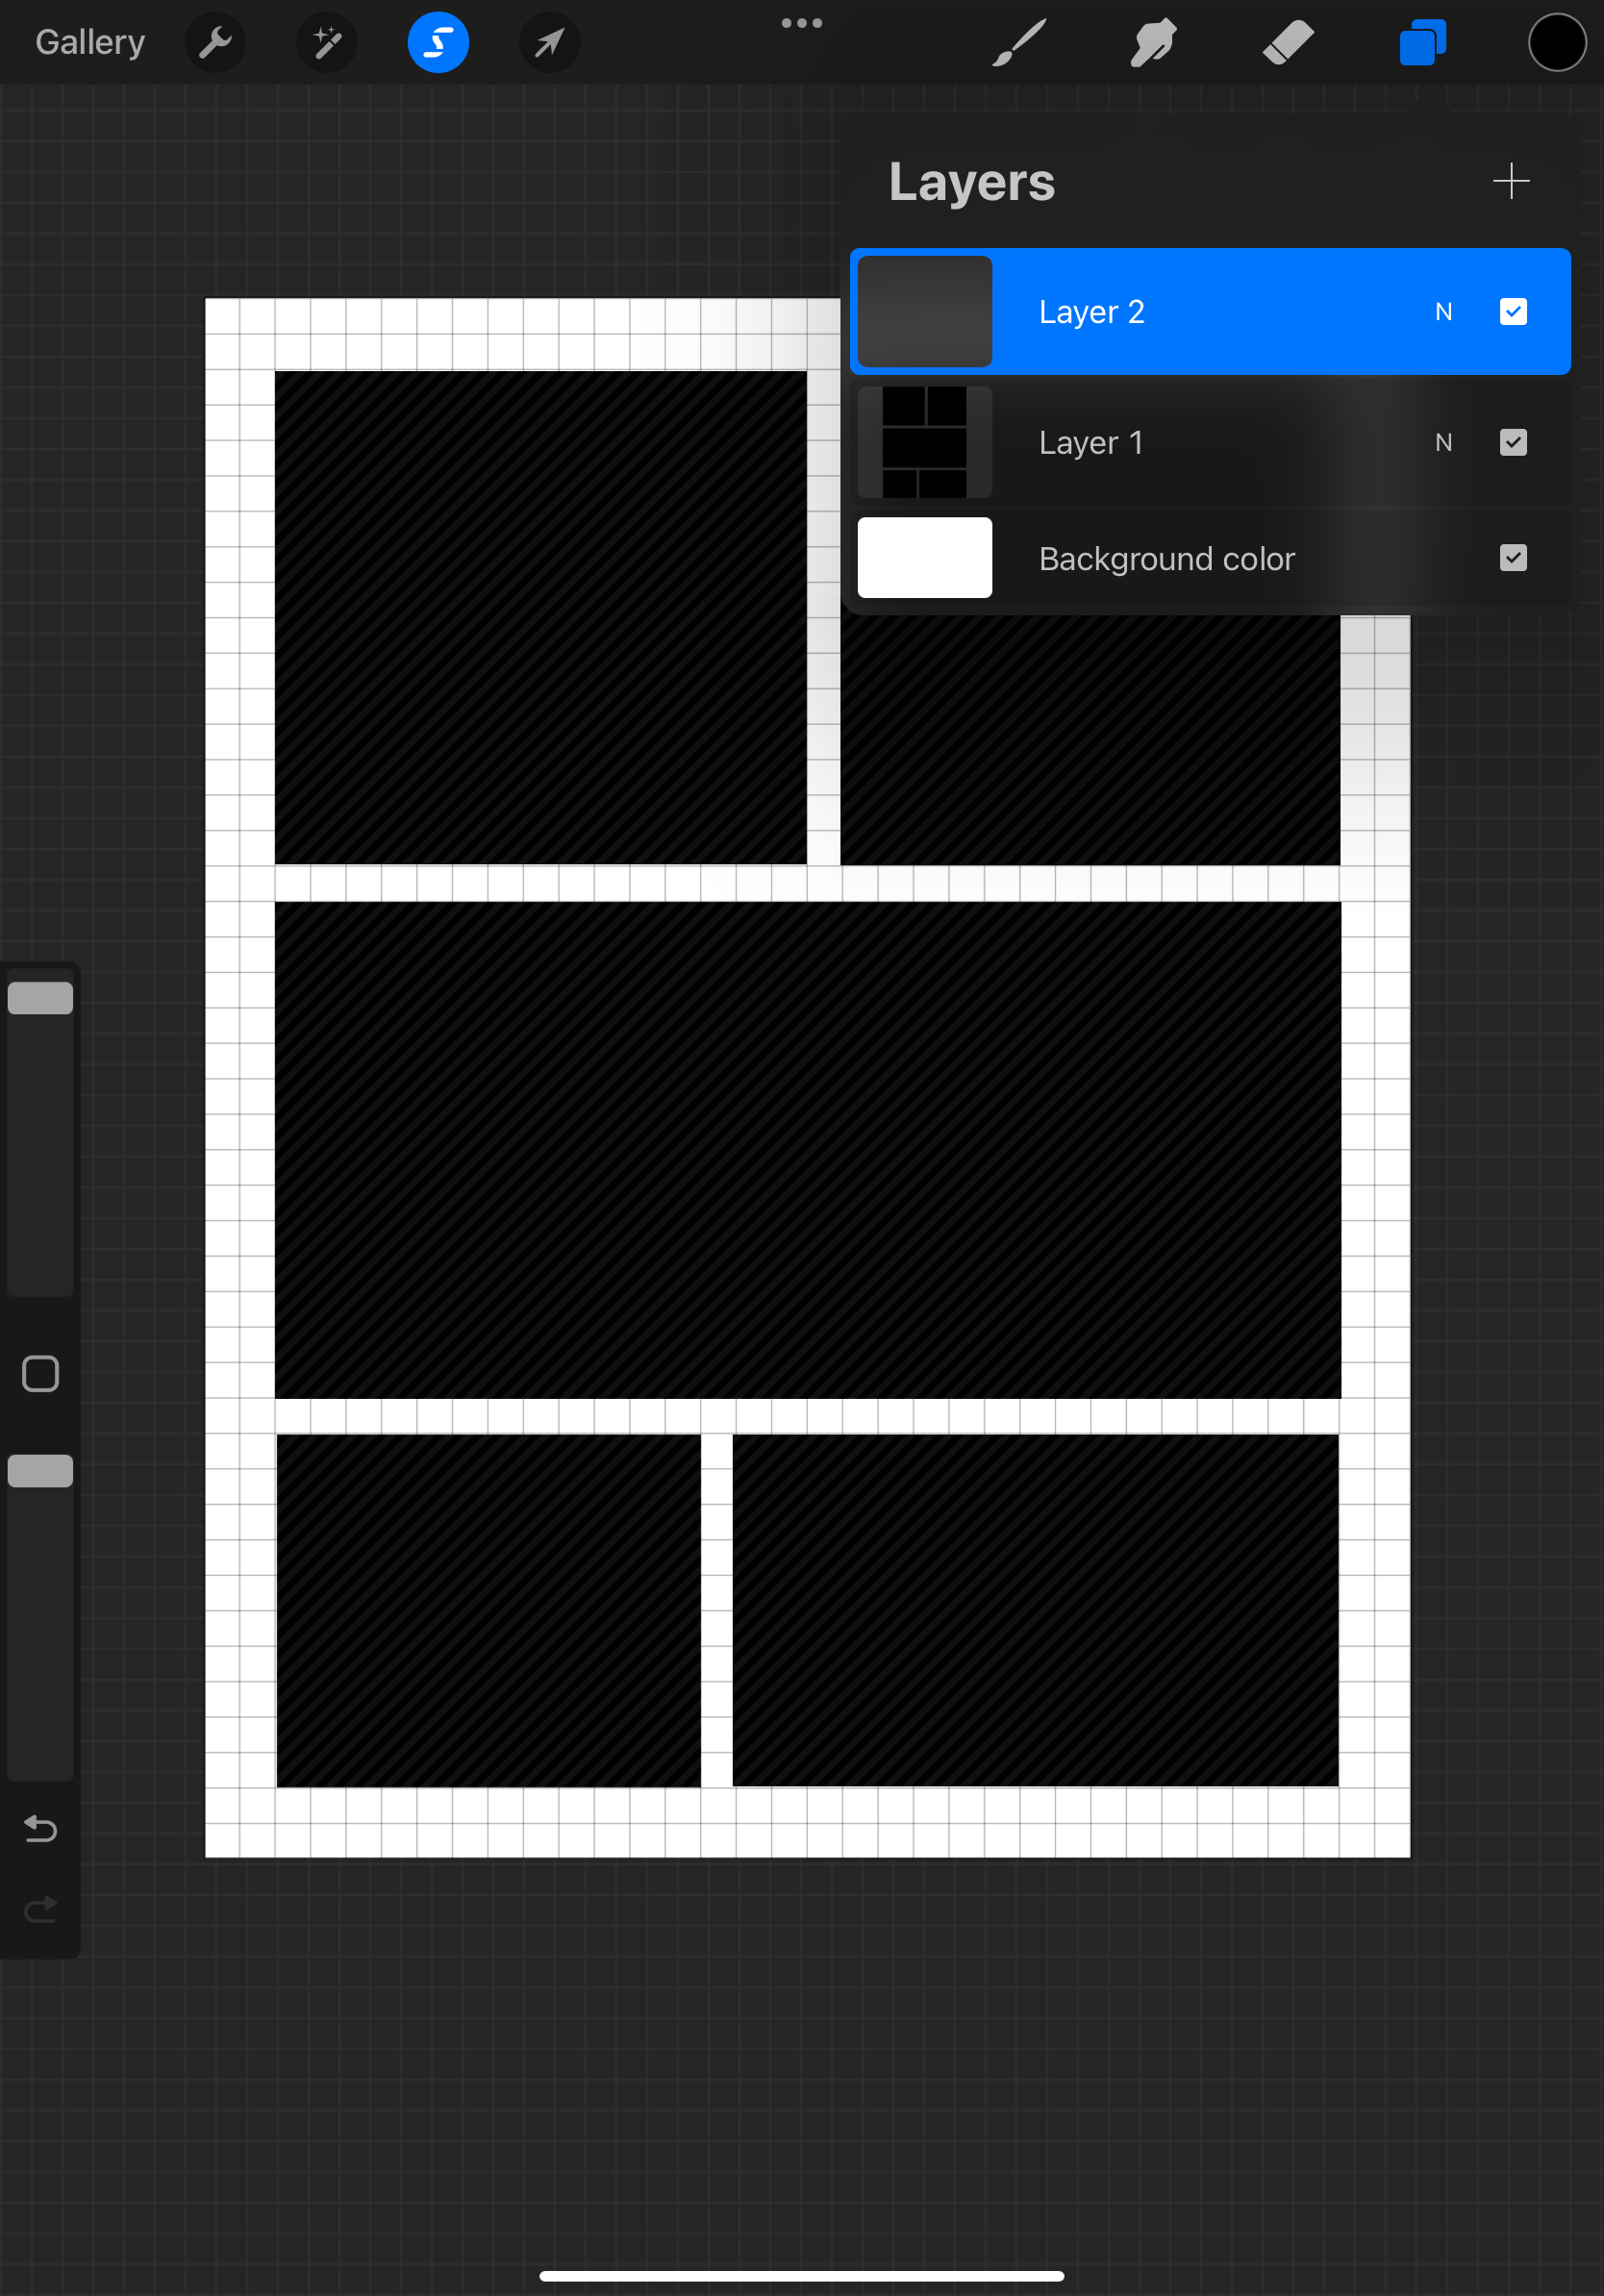
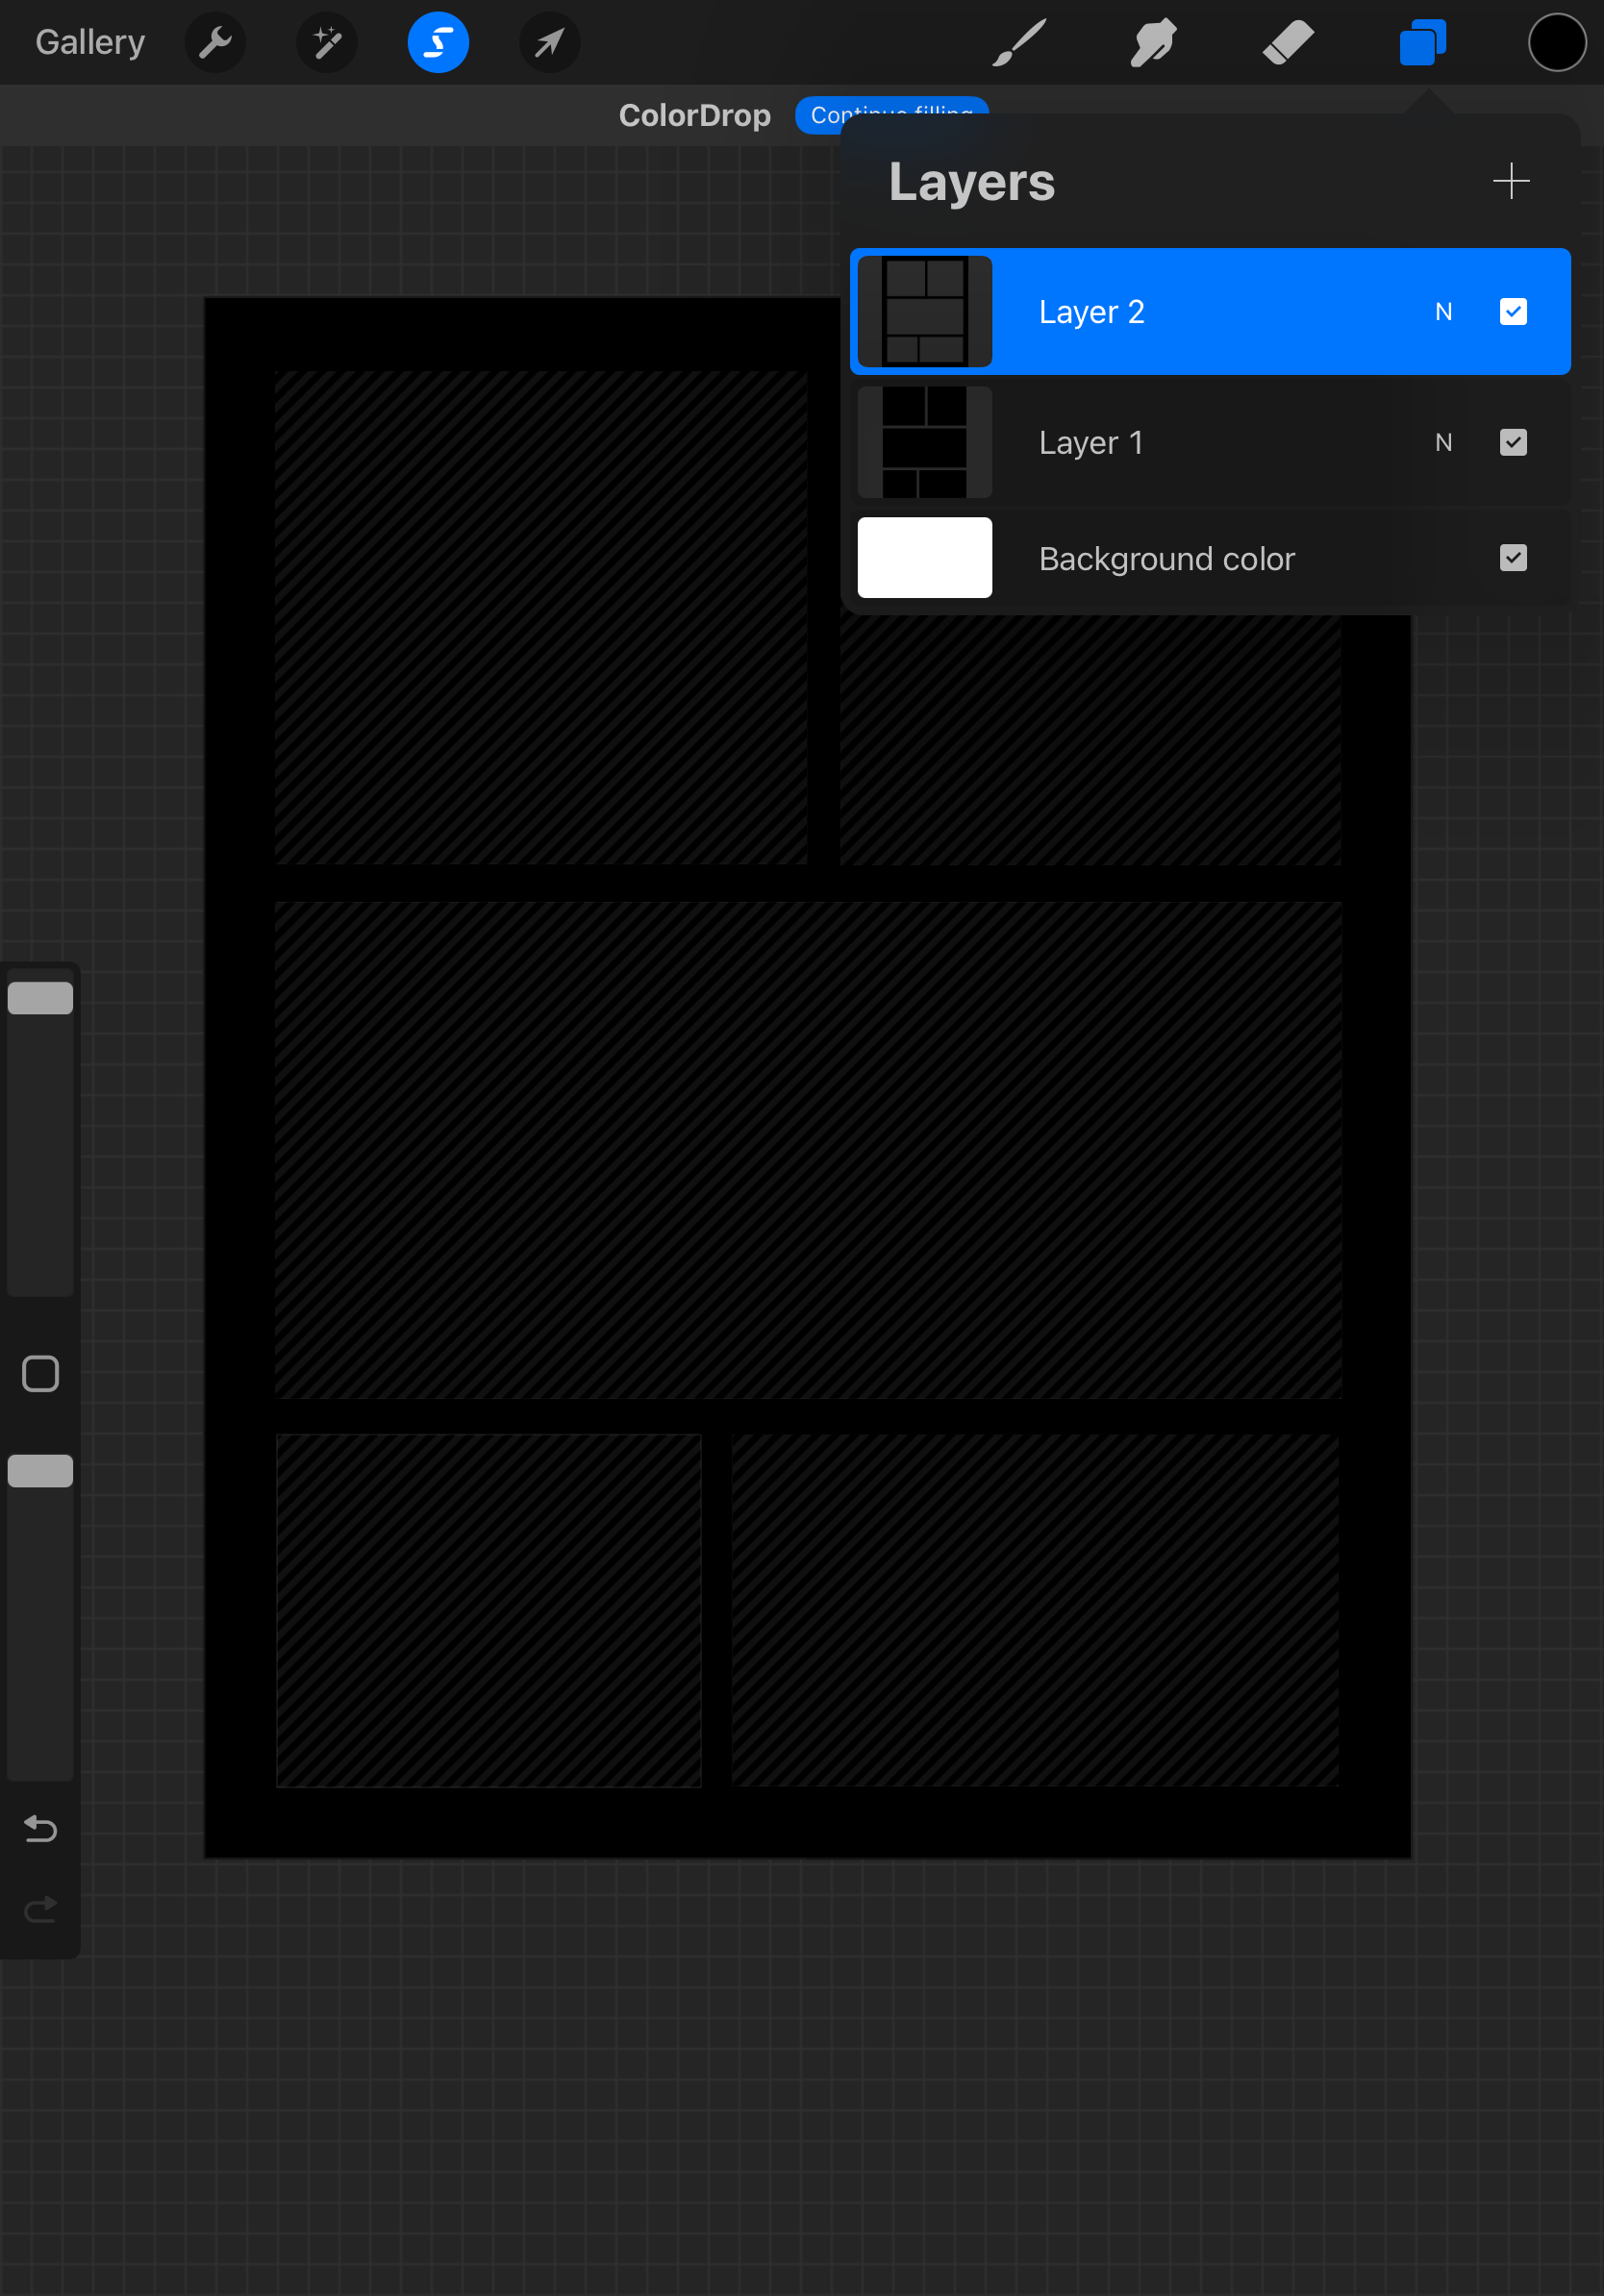
Step 9: With the spaces between panels still selected, drag and drop a colour fill into that selection.
Don't worry if your two layers are the same fill colour and so aren't distinguishable. We'll get there.
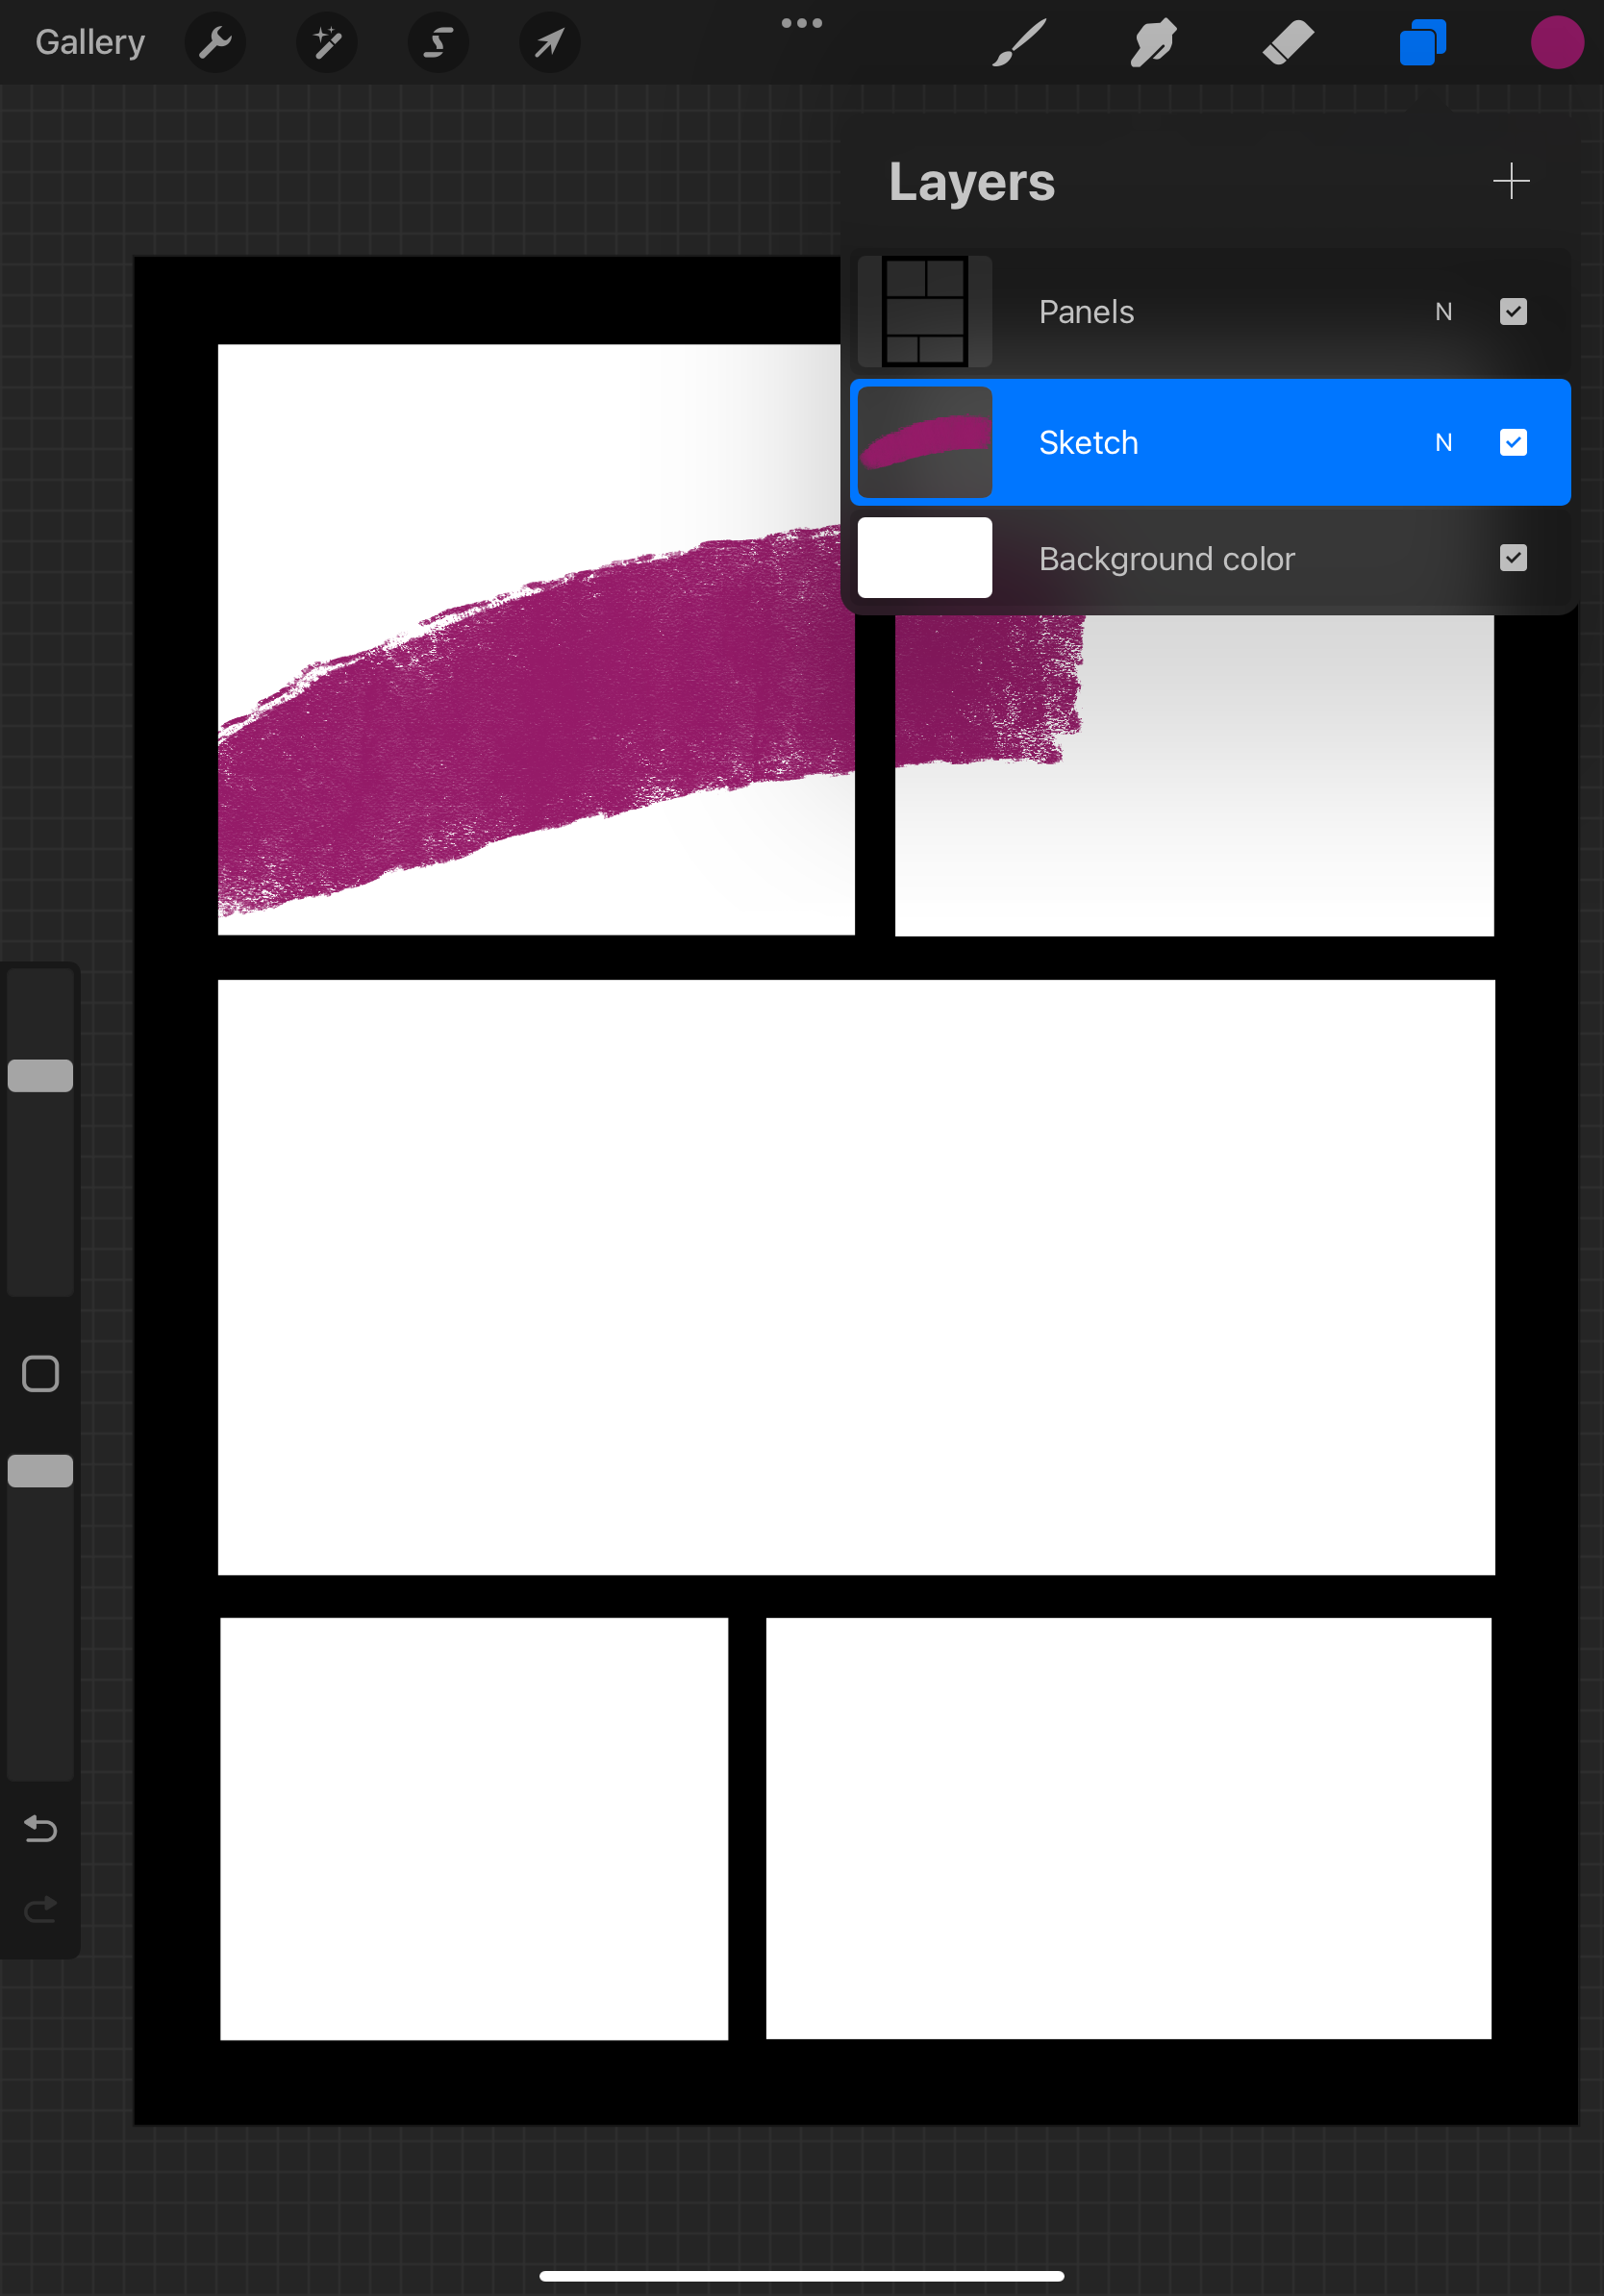
Step 10: Delete (or hide) the original layer that had the panels in it. This leaves you with panel frames that you can put layers behind for art! Even if you draw across panels, the “frames” hide anything in the gutters or margins.
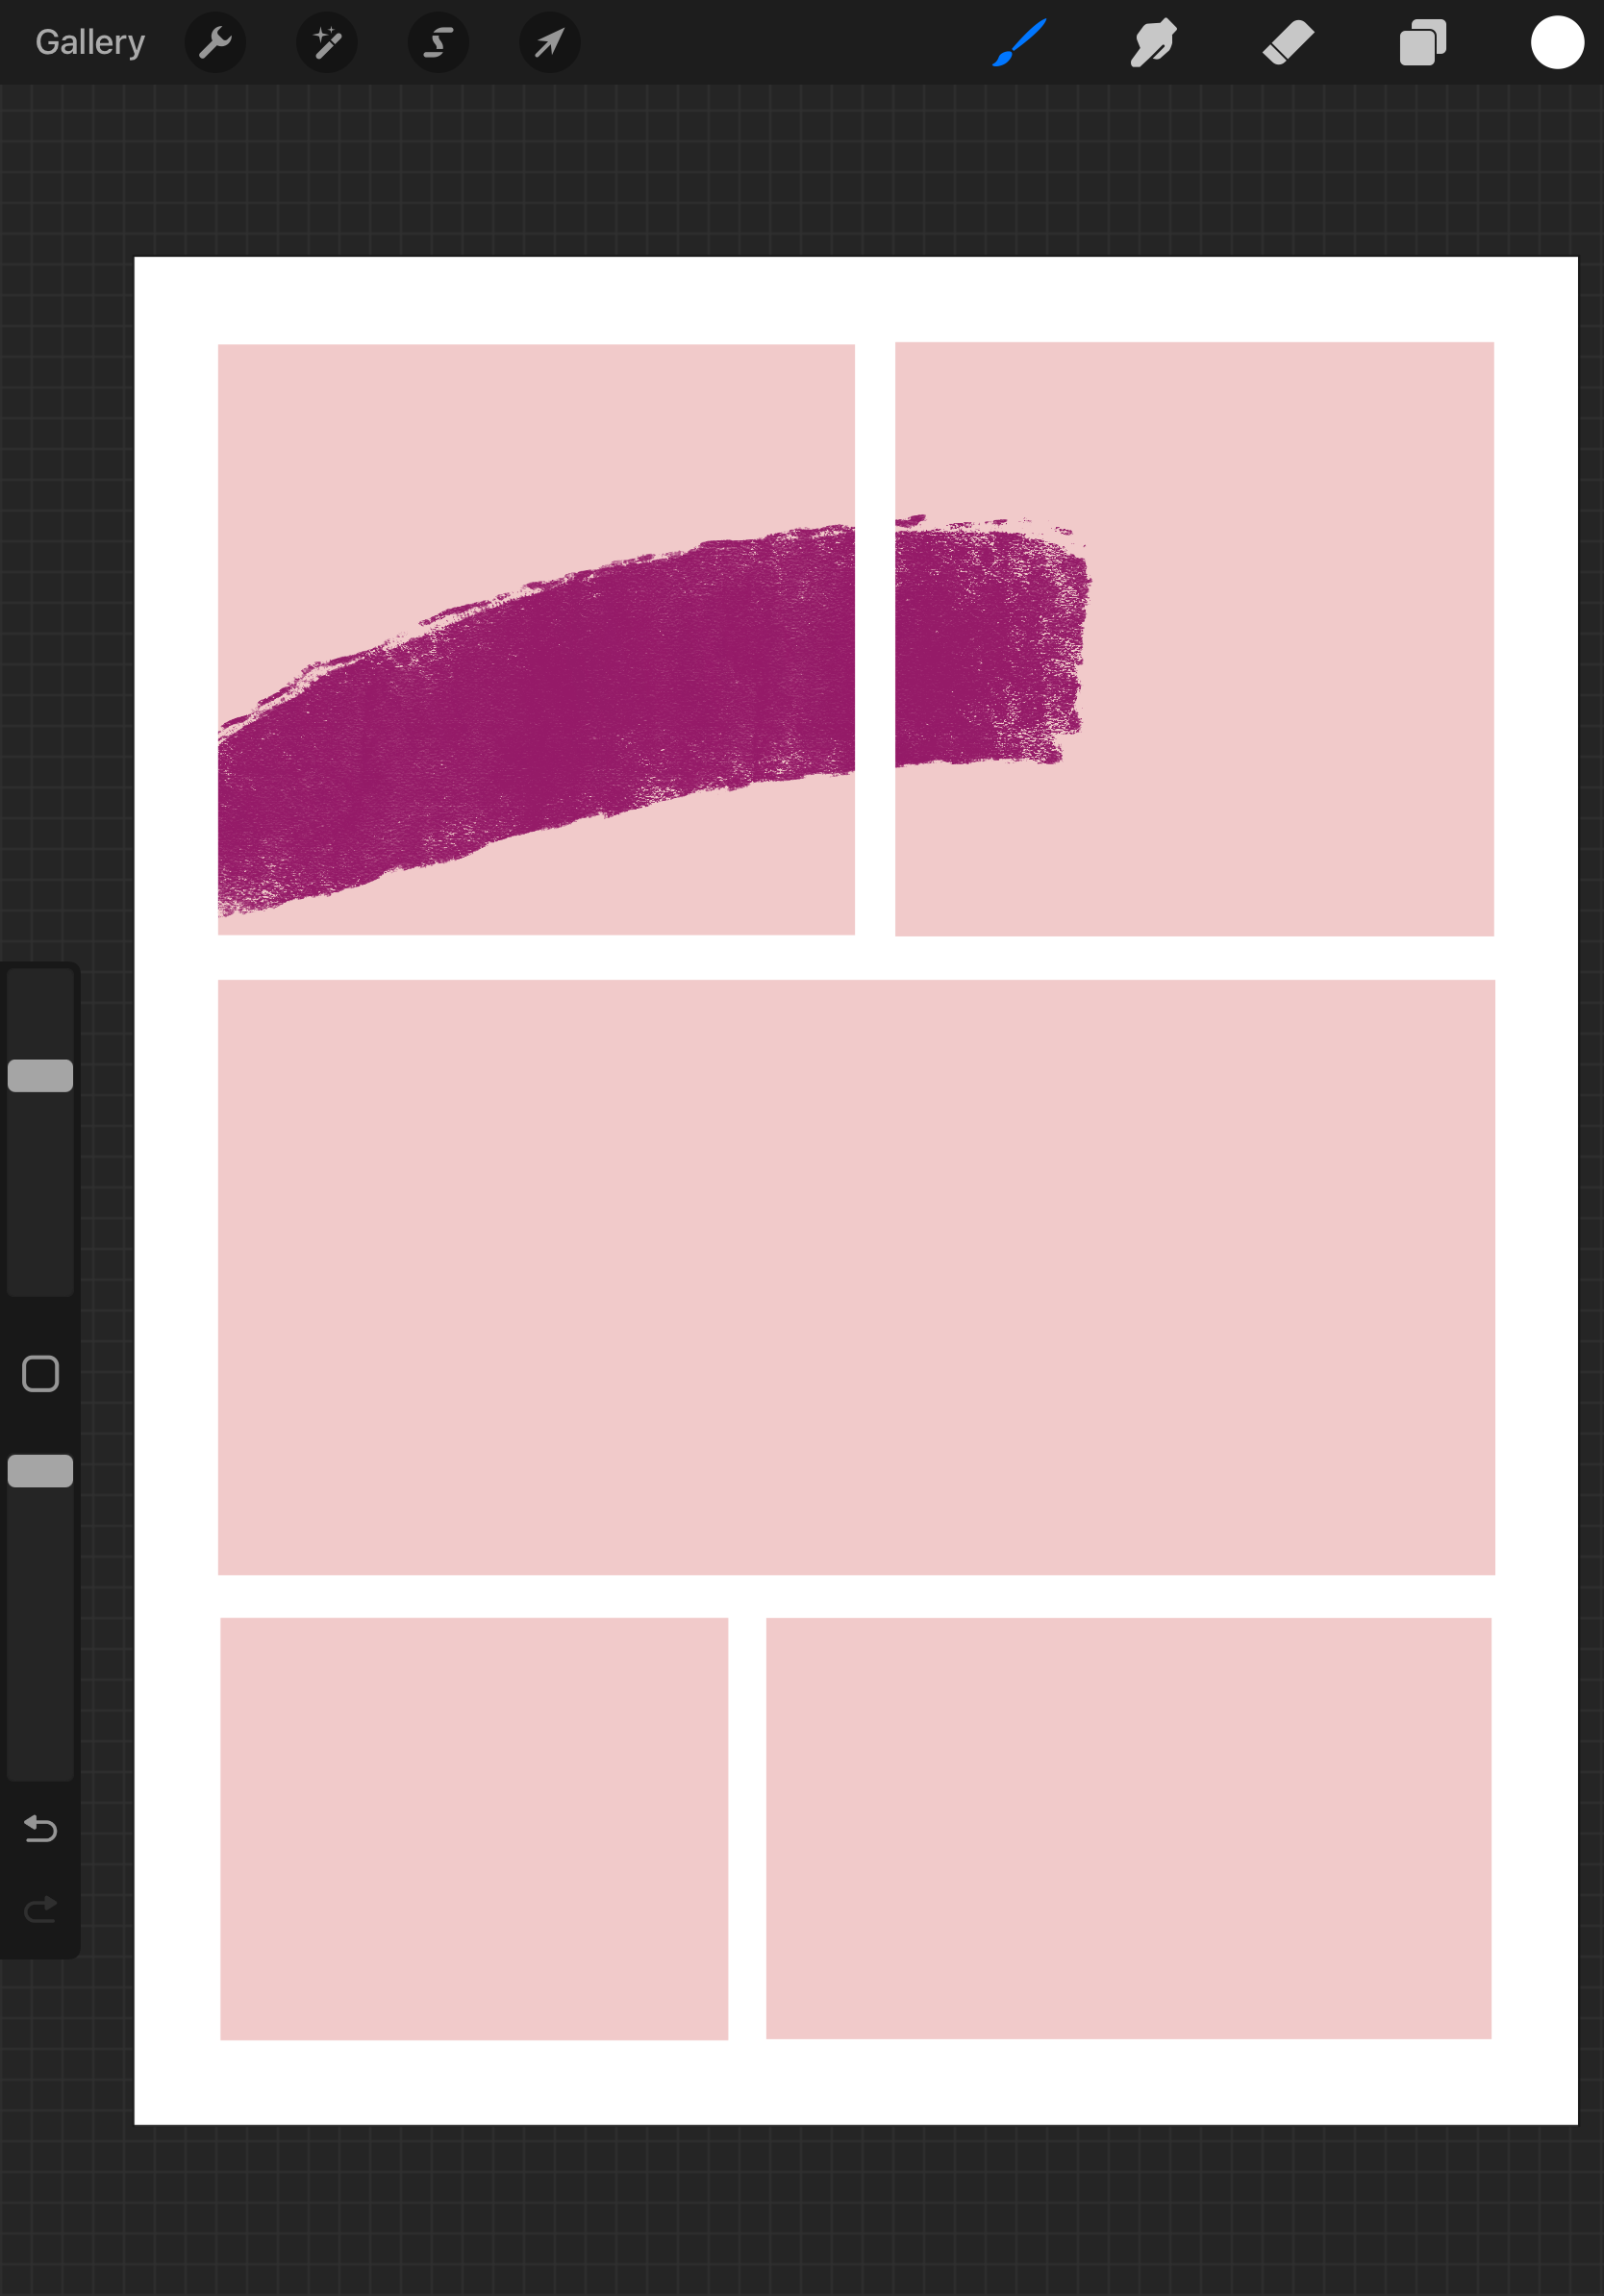
Step 11: The space around the panels can be changed to any colour. White is a nice choice! If you change the panels to white, you may want to slightly alter your background colour while you sketch so you can still see the panels.
That’s it! You are now ready to fill your panels with beautiful art.
- March 2025
- February 2025
-
January 2025
- Jan 28, 2025 Illustration for Beginners: Working with Basic Shapes
- Jan 27, 2025 How to Get Started in Illustration: Ten Steps for Beginners
- Jan 17, 2025 Five Reasons I Love the Character Design in Dragon Age: the Veilguard
- Jan 16, 2025 Defining Your Art Style: Five Questions to Ask Yourself
- Jan 15, 2025 Building Confidence in Figure Drawing: 5 Mindset Shifts to Overcome Fear
- Jan 14, 2025 Life Drawing vs. Photo Reference: Pros, Cons, and Best Practices
- Jan 13, 2025 Procreate vs Photoshop: 5 Pros and Cons of Each Software
- Jan 10, 2025 Mind Mapping for Artists: Turning Abstract Ideas into Tangible Concepts
- Jan 9, 2025 Observation as Inspiration: Cultivating Mindfulness to See the World Differently
- Jan 8, 2025 Overcoming Fear of Failure: Five Tips for Developing a Growth Mindset in Your Art Practice
- Jan 7, 2025 Embracing Constraints: How Limits Can Boost Your Creativity
- Jan 2, 2025 What Can You Do With an Illustration Degree? 5 Career Options
- Jan 1, 2025 Five Things You Probably Didn’t Know About Printing
- December 2024
-
November 2024
- Nov 15, 2024 Character Concepts - Brainstorming Activity
- Nov 14, 2024 Designing Characters - Three Examples from the Pros
- Nov 13, 2024 Five Tips for Successful Comic Scripts
- Nov 12, 2024 Five Steps to a Masterful Outline for Your Comic
- Nov 11, 2024 How to Get Started Making Comics: Step Breakdown
- Nov 8, 2024 Three Reasons You Should Build a Creative Community
- Nov 7, 2024 Five Essential Skills for Making a Graphic Novel
- Nov 6, 2024 Five Steps to a Digital Character Illustration on Procreate
- Nov 5, 2024 Digital vs Traditional Illustration - 4 Myths Busted
- Nov 4, 2024 Three Gesture Drawing Methods You Probably Haven’t Tried Before
- Nov 1, 2024 The Seven Key Elements of Art Making
-
October 2024
- Oct 31, 2024 Three Unexpectedly Great Illustration Resources
- Oct 30, 2024 Ten Essential Skills Every Illustrator Should Practice
- Oct 29, 2024 Top Five Procreate Tips to Enhance Your Digital Illustration
- Oct 28, 2024 Seven Things I Learned About Illustration and Art Working in the Print Industry
- Oct 25, 2024 Five Viz Media Graphic Novels That Transcend the Genre
- Oct 24, 2024 Top Five Drawn and Quarterly Comics To Blow Your Mind
- Oct 23, 2024 Top Five First Second Comics to Get Cozy With
- Oct 22, 2024 Top 5 Image Comics You Need to Read Right Now
- Oct 21, 2024 Art News 002: Foodways at the Richmond Art Gallery
- Oct 18, 2024 Six Tips for Photographing Work for Your Art School Portfolio
- Oct 17, 2024 5 Ways to Make Your Art School Portfolio More Conceptual
- Oct 16, 2024 5 Unofficial Rules of Receiving a USEFUL Art School Portfolio Review
- Oct 15, 2024 Ten Things to Avoid in Your Art School Portfolio
- Oct 14, 2024 5 Things Your Art School Portfolio Should Say About You
- Oct 11, 2024 7 Tools for Drawing Perspective Without a Ruler
- Oct 10, 2024 5 Tips to Start a Daily Drawing Practice
- Oct 9, 2024 Ten Japanese Illustrators You Should Know
- Oct 8, 2024 Meet the Art Coach!
- Oct 7, 2024 Ten Tips to Get Started with Gesture Drawing
- Oct 4, 2024 Nouns + Adjectives - a Silly Illustration Game to Spark Inspiration
- Oct 3, 2024 Five Ways to Boost Your Creativity
- Oct 2, 2024 How I Make Comic Panels in Procreate
- Oct 1, 2024 OC-tober 2024, a Month of Art Prompts
-
September 2024
- Sep 25, 2024 Three Comic Book Art Styles You Might Not Know
- Sep 24, 2024 Five Questions to Ask an Art Coach
- Sep 23, 2024 Let’s Make Characters!
- Sep 20, 2024 Art News - 001
- Sep 19, 2024 Top Five Manga if You Don’t Read Manga
- Sep 18, 2024 How to Think About Character Design
- Sep 17, 2024 Book Printing Basics
- Sep 16, 2024 Top Five Reasons You Might Need an Art Coach in 2024
- Sep 11, 2024 Top Five Things Artists Can Learn From Their Peers
- Sep 10, 2024 Top Ten Figure Drawing Tips for Illustrators
- Sep 9, 2024 Top Five Art Books You Should Own
